Search the Community
Showing results for tags 'tutorial'.
-

tutorial Editing Hidden Grottos via Hex
Drayano posted a topic in ROM - NDS Guides and Other Resources
It occurs to me that I've not actually explained how to do this yet so I figure I may as well: Step 1 - What's the file you need? You'll need to extract the a/2/7/3 .narc file from Black 2 or White 2. It doesn't really matter which. Step 2 - Starting Preparations. Open it up in a hex editor. I'd recommend crystaltile2 so you can quite easily jump between the files. Alternatively, you can use the kiwi.ds editor to extract the files separately, or whatever other method you wish. I'll walk through this tutorial using the Floccessy Ranch Grotto, which is the first file in the .narc. Step 3 - Editing the Pokémon Species. The whole of the first file looks like this: Now it's time to dissect what the file actually means! I'd highly recommend paying attention to this. It's a textified version of the Hidden Grotto listings done by Kaphotics, and it'll help you read what's going on here. The "CE 00 CE 00 CE 00 CE 00" at the start of the file is a reference to the four Pokémon who can appear with 1% frequency. In this case, Dunsparce takes up Group A, B, C, and D. Why Dunsparce? Dunsparce's index number is 206, which is 0x00CE (where 0x signifies it's a hexadecimal number). However, Pokémon games tend to use indices in a flipped form - the latter two bytes come FIRST, and then the former two bytes come last. So 00 CE becomes CE 00, and thus you see it as it's found in the data. You'll notice other similar strings within this document. As you can see from Kaphotics' list, Herdier is the middle frequency Pokémon. Herdier's National and also index number is 507 -> 0x01FB -> FB 01. You'll see two instances of "FB 01 FB 01 FB 01 FB 01" in the file (also two of "CE 00 CE 00 CE 00 CE 00). The first one refers to Black 2, and the second refers to White 2. So essentially, the file is split like this: The first part is the Black 2 encounter possibilites, the second part is what can appear in White 2. Most of the time this isn't utilised in the game, although you can see it in action in some areas such as Pinwheel Forest's interior, where Beedrill is found in Black 2 and Butterfree in White 2. In the Floccessy Ranch example, you can also see strings for Marill. Marill is 183 -> 0x00B7 -> B7 00, thus "B7 00 B7 00 B7 00 B7 00". Actually changing the species is simple - you just edit the strings shown! For example, if you always want Bulbasaur to appear in the Hidden Grotto with a 1% appearance rate, then you'd replace both instances of "CE 00 CE 00 CE 00 CE 00" with "01 00 01 00 01 00 01 00". That is of course, assuming you want the same effect in Black 2 and White 2. Alternatively, you might want any one of Bulbasaur, Charmander, Squirtle, or Pikachu to appear with a medium rate in the Hidden Grotto. This time, you'd replace the medium rate Pokémon string (Herdier, so FB 01 FB 01 FB 01 FB 01) with "01 00 04 00 07 00 19 00", referring to their index numbers 001, 004, 007 and 025 respectively. This gives them all an equal opportunity to be called (I think) when that encounter rate is selected. Thus, you can have to up to 12 Pokémon appear in a single Grotto on any version! So, that's the species. But what's the rest? N.B.: You can place any species in the Hidden Grotto, but they must have an overworld sprite in the game for them to show up. The first 493 Pokémon can all show up, but only the Unovian Pokémon shown on this sprite sheet will be able to show up successfully. Otherwise, you'll get a generic placeholder overworld (a boy with blue hair).. Step 4 - Editing the Other Pokémon Info. Let's take a look at an entire string of Pokémon hex in the Grotto, for one version: "CE 00 CE 00 CE 00 CE 00 0F 0F 0F 0F 0A 0A 0A 0A 1E 1E 1E 1E 00 00 00 00" "FB 01 FB 01 FB 01 FB 01 0F 0F 0F 0F 0A 0A 0A 0A 1E 1E 1E 1E 00 00 00 00" "B7 00 B7 00 B7 00 B7 00 0F 0F 0F 0F 0A 0A 0A 0A 1E 1E 1E 1E 00 00 00 00" Now, we already know these three strings combined make up the Pokémon selection pool for one version. The first one is the rarest, the second the middle, and the third the most common. You're also aware that there's actually four separate Pokémon that can be called in each group - although the game rarely has more than two species in the same group. (You can see an example of there being two in Route 9.) However, what does the remaining part mean? Let's analyse this... CE 00 CE 00 CE 00 CE 00 0F 0F 0F 0F 0A 0A 0A 0A 1E 1E 1E 1E 00 00 00 00 [color="Red"]CE 00 CE 00 CE 00 CE 00[/color] [color="RoyalBlue"]0F 0F 0F 0F [/color][color="SeaGreen"]0A 0A 0A 0A[/color] [color="Orange"]1E 1E 1E 1E[/color] 00 00 00 00 Suddenly the separate parts become a lot clearer! We already know the Pokémon species indices are the ones in red. The four bytes in blue refer to the maximum level that a Pokémon can be. The four bytes in green refer to the minimum level a Pokémon can be. The four bytes in orange refer to the percentage chance that the Pokémon that appears is female. Hidden Grottos don't generate Pokémon genders in the same way regular encounters do! As far as I'm aware, the last four bytes are always 00 00 00 00, so we don't need to worry about those. NOTE: It appears these values refer to the form(e) the Pokémon will take. I assume it works by slot correspondence, e.g. if your first Pokémon byte is EC 01, then set the first of these bytes to 01 and you should get the Sky Forme generating. There's one other important distinction here; the bytes are in groups of four as they each refer to a particular group! So in reality, they're split up as follows: [color="DarkOrchid"]CE 00[/color] [color="Lime"]CE 00[/color] [color="Teal"]CE 00[/color] [color="DarkRed"]CE 00[/color] [color="DarkOrchid"]0F[/color] [color="Lime"]0F[/color] [color="Teal"]0F [/color][color="DarkRed"]0F[/color] [color="DarkOrchid"]0A[/color] [color="Lime"]0A[/color] [color="Teal"]0A[/color] [color="DarkRed"]0A[/color] [color="DarkOrchid"]1E[/color] [color="Lime"]1E[/color] [color="Teal"]1E[/color] [color="DarkRed"]1E[/color] 00 00 00 00 The bytes that have a matching colour are the ones that are related to each other. Let's use one of our example strings from before... 01 00 04 00 07 00 19 00 14 14 14 14 0F 0F 0F 0F 32 32 32 32 00 00 00 00 This might be more easily read like this (even though you can't input this): "01 00 14 0F 32 00" - Species: Bulbasaur. Max Level: 20. Min Level: 15. Female rate: 50%. "04 00 14 0F 32 00" - Species: Charmander. Max Level: 20. Min Level: 15. Female rate: 50%. "07 00 14 0F 32 00" - Species: Squirtle. Max Level: 20. Min Level: 15. Female rate: 50%. "19 00 14 0F 32 00" - Species: Pikachu. Max Level: 20. Min Level: 15. Female rate: 50%. Just for a quick translation: 0x14 = 20. 0x19 = 25. 0x0F = 15. 0x32 = 50. The Pokémon in question can at any level between the max/min levels inclusive. For example, a Bulbasaur could generate in the Grotto and be encountered at Level 15, 16, 17, 18, 19, or 20. It also has a 50% chance of being female. From this it should be easy enough to see what's going on now. Just adjust the values to what you need! Quick word of warning, though. You cannot have the max and min levels be the same. If you do that, some funky stuff starts happening and they seem to be able to appear at any level they want. If you want them to appear at only one level, then use the max level as (min level + 1). This generally seems to cause them to appear at the minimum level anyway (though possibly not always). Step 5 - What's the rest? The remaining part of the Grotto files deal with the items that you can find in them. Using the Floccessy Ranch example again: The highlighted section is our items. It may look like random numbers, but when cross-compared with this page, it isn't! As we can see from that link, 0x0052 refers to a Fire Stone, 0x0054 to Water, 0x0053 to Thunder and 0x0055 to Leaf. This matches up with the Item 1 row in Kaphotics' list. Then the next bytes... 0x0002 are Ultra Balls, 0x004D is a Max Repel, and 0x0019 is a Hyper Potion. That's the item 2 list... etc. You probably get the idea by now. So, in short... First 8 bytes - 2 bytes for each group, visible item 1%. Next 8 bytes - 2 bytes for each group, visible item 4%. Next 8 - visible item 10% Next 8 - Visible item 25% The next 32 bytes refer to the four groups of hidden items, but it works in exactly the same way. There's no difference in the items between Black 2 and White 2, so whatever changes you make should appear the same in both. Step 6 - What file is what? These are listed in order in Kaphotics' list anyway, but in case you want another reference point: File 0 - Floccessy Ranch File 1 - Route 5* File 2 - Lostlorn Forest File 3 - Route 6 [Field, the one just around the corner from Driftveil] File 4 - Route 6 [Cave, the one just outside Mistralton Cave] File 5 - Route 7 File 6 - Route 13 [stairLeft, the one next to the staircase close to Cobalion] File 7 - Route 13 [stairDown, the one close to the Giant Chasm entrance] File 8 - Route 9 File 9 - Giant Chasm [in the plains, only after you defeat Ghetsis] File 10 - Route 22 File 11 - Route 23 File 12 - Abundant Shrine [Field, ie the one accessible by land only] File 13 - Abundant Shrine [Pond, you need Surf to access this one.] File 14 - Pinwheel Forest [interior, inside the forest over a river.] File 15 - Pinwheel Forest [Exterior, by the Challenge Rock.] File 16 - Route 3 [Daycare, the one just above the Doubles grass] File 17 - Route 3 [Pond, across the large pond] File 18 - Route 2 File 19 - Route 18 * The first Pokémon entry here (for your version) is the one that will appear by default when Bianca shows you this Grotto for the first time. --- Hopefully that helps some people. -
PPRE Tutorial & FAQ Welcome to the Project Pokémon´s ROM Editor Tutorial and FAQ! Please go to THIS TOPIC to download the newest version of PPRE. This tutorial should give you all the information you'll need to get the programme working. Some extra information is given in CODE fields. You can ignore these parts of the tutorial if you already know how it works. If you already have your map with the downloaded files and a Rom File, you can SKIP STEP 1. If you're uncertain if you did the right things, just read STEP 1 as well. Tutorial Step 1 First create a New Map. For example, go to My Documents, hit the right mouse button and select 'New > Map'. Rename this map to 'PPRE' for convenience. I'll call the new created map PPRE from now on. The second step is to download the programme. Check the official PPRE Topic for a download link. What you actually download is a .ZIP file. [size=3][b]Extra:[/b] [i]What are .ZIP files and how do I open them?[/i][/size] With special programmes, you can create .ZIP files. .ZIP files make it easier to carry different files; it compresses SEVERAL files to ONE file. For example; to get PPRE working, you need 3 other files. Instead of downloading these 3 other files seperately, you can just download them all at once via a .ZIP (''package'') file. You can open .ZIP files with programmes like WinRAR or WinZIP. Evaluation Versions of these programmes can be downloaded for free from their sites. Just click one of the links below to go to their official site. [list] [*][url="http://www.rarlab.com/download.htm"]WinRAR[/url] [*][url="http://www.winzip.com/index.htm"]WinZIP[/url] [/list] Open the downloaded .ZIP file with either WinRAR of WinZip. It contains 4 files, which should be: ndstool.exe ppre.exe Tabel.tbl thenewpoketext.exe If this is correct, select the 4 Files and hit the right mouse button. Now click 'Extract...' (or something like that, it might differ between the programmes). (Check the Spoiler for an image) A new screen opens. Search for your new created map and hit the Unzip / Extract button. The 4 files will be extracted to your new map! You now need a Pokémon Rom. It has to be one of the following Roms: Pokémon Diamond Pokémon Pearl Pokémon Platinum Pokémon Heart Gold Pokémon Soul Silver [size=3][b]Extra:[/b] [i]Where can I download a Rom File?[/i][/size] Please remember though that Rom Files are [b]ILLEGAL[/b]. You may only use them if you have an original copy of the game. I can't help you with downloading a Rom file as they are illegal. NEVER ask for a Rom File on this forum. The rom has to be UNTRIMMED (untouched). The Rom should be in a .ZIP file, too. You have to Extract the Rom to the SAME NEW MAP! The following thing is very IMPORTANT. Open your new map where your Rom File should be. Now RENAME the Rom File. For example, if you have a Pokémon Diamond rom, rename it to: diamond.nds, if you have a Pokémon Platinum Rom, rename it to platinum.nds and if you have a Soul Silver Rom, rename it to soulsilver.nds, etc.! This might seem unnecessary, but it is very important. What we have is a New Map (hopefully named PPRE) with 5 files (the 4 PPRE files and 1 Pokémon Rom). Step 2 Now you have to open the ppre.exe file. Double click to open it. You should see the following screen (beta-number might differ). Follow the following steps to get the programme working. Never forget any of these steps or it will go wrong! Step 1: type in the name of your Rom (which should be diamond.nds, pearl.nds, platinum.nds, heartgold.nds or soulsilver.nds) in the RED TEXT FIELD. With 'Red' I mean the red-circled field as you can see in the screenshot above. You have to add the '.NDS' suffix! Step 2: Now you click the green-circled button 'Set Rom'. A black screen should open. Please wait, it will take around 1 minute. Do not click anywhere during the progress. When the black screen goes away, you can continue to Step 3. [size=3][b]Extra:[/b] [i]What is happening during Step 2?[/i][/size] The ppre programme is now 'opening' your rom. It uses the ndstool.exe file to create a temporary map, which is needed to edit your Rom. In your PPRE map, a new map should be created, called: tmp_platinum if your game was Pokémon Platinum Version, or tmp_pearl if your game was Pearl, and so on! This map is needed to edit with PPRE, so DO NOT delete that map. Step 3: it's time to edit! I might create a tutorial about how that works, too, but for now, you should be able to do it yourself! You can edit POKéMON, MAPS and TRAINERS. As this is a Beta, you can not edit ABILITIES, ITEMS, MOVES, etc. yet. Don't click that buttons. Step 4: ah, so you changed the things you like? You made Lugia evolve into Magikarp and Pikachu evolve into Arceus? Eh, nice. Now you have to save your game. Take a look at the screenshot. You see the blue-circled textfield? You have to enter the following: pearledit.nds if you were editing a Pearl Rom, platinumedit.nds if you were editing a Platinum Rom, heartgoldedit.nds if you were editing a Heart Gold Rom and so on! Step 5: now click the orange/yellow-circled button 'Write ROM'. Wait a minute again and take a look at your PPRE map. A new file called platinumedit.nds (or something else, depending on the rom you're changing) should be created! YOU NOW PERFECTLY EDITED YOUR ROM! Thanks for using this tutorial! Happy Rom-editing! [ --- I'LL ADD THE FAQ HERE VERY SOON AND UPDATE IT FROM TIME TO TIME, PLEASE HAVE SOME PATIENCE! --- ] @ the Moderators, as my mother language is not English, be free to edit any typo's and spelling errors.
-

tutorial PPRE Trainer Battle Script
TheShadowWalke posted a topic in ROM - NDS Guides and Other Resources
EDIT: I added a new script at the bottom of this post. Hi guys, this is my first tutorial so sorry for mistakes Anyways, like the title says, it's about Pokemon Trainer Battle Scripting. So far I only know it works for HG/SS. If you want to use in Platinum or D/P, feel free to try and please tell me if it works. On to the tutorial. Here are the tools you need: Once you've downloaded the things needed, put your HG/SS rom into PPRE's folder. Then open up PPRE and click on choose rom. Select your rom and click Set Rom. Then command prompt should appear. PPRE is extracting your rom now. Once PPRE has finished, click on Trainers. Once you opened up Trainers, select a random trainer from the list. Edit the Trainer's information now(Number of Pokemon he/she had and so on). Once you changed the number of Pokemon, click another trainer from the list and go back to the trainer you edited to see that the number of Pokemon had changed. NOTE: I can't seem to edit the Trainer's name, so I used an older version of PPRE, which worked. However, the Pokemon's level is maximum 99 and I cant save my scripts using that. After you've edited the Trainer, TAKE NOTE OF THE NUMBER BESIDE HIS/HER NAME. IT'S VERY IMPORTANT. For me it's 24. Save your changes afterwards. Next, go to Maps and choose the map you want. For me I'm going to use Cianwood City Gym. Go to the Events tab and click on Overworlds. See the number at the top right corner? That's the number of overworlds. Click on the up arrow to increase the number of overworlds. You might see a new tab now. Type in the ID of the overworld, which is this: Now type in the sprite. The values for them are here: However, PPRE can read only Dec numbers, but these are Hex numbers. So open up Calculator, and go to the Scientific Mode for XP. I don't know what to press for the other computers so you have to figure out yourself. Go to Hex and type in the number for the sprite. Click on Dec next to get the Dec number. Write this in PPRE. Next for the movement. I don't really have the list for the movements(I'm too lazy to figure out :'( So if you got the list, please tell me and I will give credit.) However I do know that 15 is facing down and 20 is facing up.) Type it in the box. Flag... I don't really know what's that but I will figure it out sometime, probably after B/W is released.. I'm just too busy :sleeping: Script we will come to it later. Line of Sight, by the name, you probably know what's it. It's use for detection for normal trainers, like when you're walking along Viridan Forest when a trainer spot you. X-, Y- and Z- coordinate, pretty simple. I don't know bout Z though. Anyway, you might ask, how do we find the X and Y coordinate? Simple! Using the Lua Script, open it in DeSmuME and activate the script! Move to the spot where you want your trainer to be at and he will stand there! However the Lua Script doesn't work on Patched Roms. After finding out the X and Y coordinate, type it in the boxes. Once you've done all these, take note of the ID of your overworld. Next, go to the Text tab. You will see that there's already a lot of text. Write your trainer's beginning and losing text like this: text_[continued number]="[text]" So for example I want to write this: Yo! This is a guide! And the text number is 5, I will write in PPRE this: text_5="Yo! This is a guide!" Just remember, \n is for line break and \r is for new box. After writing your text, note down the text numbers - both beginning and lose text. I don't know how to make the winning text activate, sorry Now go to the Scripts text and go to Scripts. Press add script and go to the new script. Now we can begin writing our script. Example of Script: Lockall starts your script. Lockall is basically the same as the script starter you use when hacking GBA games. Faceplayer, too, exists in GBA hacking. Just let the trainer turn to you when you talk to him/her. Message [number] is the text you wrote just now. [number] is the text number which I told you to note. WaitButton and CloseMsgOnKeyPress works together. The trainer battle will begin after you pressed A or B(WaitButton). The message will then close(CloseMsgOnKeyPress). TrainerBattle [number] 0 1 starts your trainer battle. [number] is the trainer number I told you to note just now. You can see why it's important now. Message [number] is the losing text. Releaseall MUST be present if you wrote Lockall. It releases the NPCs around. End is the ending of the script. VERY IMPORTANT. Now that you finished your script, save your changes. Go back to PPRE and type in your rom name, also remember to write in the ".nds" without the quotient marks. After your rom has finished creating, open your rom and enjoy! Also if you want to edit the sprite of your trainer, I might write a tutorial on it, but it's best if you follow KazoWAR's on Youtube. Thanks for reading my tutorial! This is my first tutorial so I hope you would rate my skills on writing tutorials. ---------------------------------------------------------------------------------------------------------------------------------------------------------------------------------------------- Here's a completely optional part: Removing people. Basically, after you've finished your battle, you can make the trainer disappear. Here's an example of the script: The new part edited, as you can see, is Applymovement 5 mov_1 Waitmovement Removepeople 5 Before I go into explaining, go to Maps, choose your map and Scripts, before finally going to Movements. Choose Add Movement. A new tab should form. Now, you have to write your movement. The movement format must be like this: [movement_name] [number_of_times] Movement_name is the type of movement you want your OW to move, such as the 1 I used, WalkDownNormal. Here's a list of the movements: Number of times is the number of steps you want your OW to move. Pretty simple, you should understand. Now to explain the script. Applymovement [OW ID] [mov_[id]] is put into your script. Applymovement is to apply a movement on [OW ID] which is your OW's ID, which I explained earlier at the previous post, and [mov_[id]] is the ID of your movement. For me it's mov_1. Waitmovement is to wait for the movement to be finished before the OWs can be released. Removepeople [OW ID] is to remove the OW you assigned to. By now you should know what's [OW ID]. So now that your movement script is finished, save your changes, write your rom and begin playing! ~Hope this helps!~ LUA Script.zip -
 Sorry guys but the results are in and this isn't working. I don't know what else to try so consider this project dead until further notice. The following is kept for informational purposes only: MUST-READ: There are several important pieces of information that you should be aware of here: I recommend that you DO NOT use the method I am going to detail here. This method is potentially risky and much more restricting than simply using a save editor (which I do recommend). This requires your copy of D/P/Pt/HG/SS to be retail; no flashcards. This requires at least one DS "Phat" or DS Lite. The second DS can be any model DS, as long as it will run Black/White from a flashcard. This requires that you flash the firmware of your DS "Phat" or Lite. Flashing carries an inherent risk of bricking your device and/or voiding your warranty. I am not responsible if that happens. That said, I have flashed my DS without a problem and will provide guidance for you. Firmware can be flashed back to its untouched state later. If after reading the above bulleted items, for whatever reason, you still want to try this method, follow the step-by-step instructions below. For now the modifications I've made are only available as part of Project Pokemon's English translation patch. Make sure you have applied the latest version from here to your B/W ROM. Just let me know if this doesn't meet your needs. Now we need to flash your DS "Phat"/Lite. Download FlashMe from here and place it on your flashcards's microSD(HC). Make sure your flashcard is in the Phat/Lite you want to flash. Boot your flashcard and run FlashMe. As it will tell you, you should plug in the charger before continuing. Once that's done press x+b twice. Now you'll see a new paragraph followed by a line reading "Progress:" ... If the progress percentage goes right to 100 and you get a new paragraph saying it's safe to turn of the DS, you're done. Most likely in that last step you didn't make it past 0%. If that's the case, get out a small Phillips screwdriver and a small flathead screwdriver. Use the Phillips to open up the battery compartment of your DS. Depending on if you have a Phat or Lite, you will see something like this: The part circled in red might have a bit of paper stuck over it, you will have to remove it. You can either discard it or try to stick it back when you're done. Now you have exposed the SL1 terminal (circled in red). As FlashMe says, we need to short this. Use your flathead screwdriver to bridge the two sides. Make sure you're applying constant, firm (but not hard) pressure on the screwdriver. Flip your DS around, still holding the screwdriver in place, and have another look at the percentage. It should be progressing upwards now. If it pauses don't panic, just adjust the screwdriver a bit and it should continue. Continue holding the screwdriver until you get a message that it is safe to turn off the DS. Turn it off and you're done flashing. You can ditch the screwdriver and put your battery cover back on. Upon turning on your DS again you'll notice that the health and safety screen is gone, this is normal. You can now PokeShift/Transfer Machine as you normally would, only with an English game. Just make sure the English game is in your flashed DS and your B/W is patched as mentioned in step one. Enjoy! Technical Note (You don't need to read this.) Some folks out there might be wondering why it's necessary to flash the client DS. After all, nobody has needed to flash a DS since practically the beginning of time right? Well, as you probably know B/W uses download play for cross-generation communication. That brought in an ancient problem in respect to editing the regions. The region is of course specified in the download play ROM (which is inside and sent from the B/W ROM); problem is, Nintendo decided in developing the original DS that all download play ROMs must be RSA signed to prevent unauthorized code execution. Lucky for me there was an ancient solution to this ancient problem: flashing, which removes the RSA signature check from the DS's firmware, freeing it to run my slightly modified ROM. =) I'd like to give a big thanks to to those who worked on FlashMe and its custom firmware; this wouldn't be possible without them.
 -
Download the patch: HeartGold - SoulSilver For those of you who just want to use this and don't give a crap about how it works, follow these simple steps: If you don't have them already, you'll need CrystalTile2 and Tsukuyomi UPS (or any UPS patching tool). I've tailored this guide/patch to work with any HG/SS ROM, no matter how much anti-anti-piracy, translation, etc. crap you've applied. Open your HG/SS ROM with CrystalTile2 (you can ignore the small window that pops up when you first open the program) and go to Tools>NDS File System. A new window will pop up with a long list of files. Scroll down until you see the one labeled "overlay9_0074", right click it, and select export. Save the file anywhere you like. Open Tsukuyomi UPS and select "apply patch to an existing file". Use the file you exported as the target file and apply the patch that corresponds to your game. Switch back to CrystalTile and right click the same file as last time, then select import and browse to your patched "overlay9_0074.bin". You're done! Save the ROM and you're ready to start migrating from your English GBA games. Now for details. I'd done this before on D/P/Pt but HG/SS's overlay files are compressed, so it wasn't as simple as the find and replace it had been in D/P/Pt. Initially this had me stumped because although I knew the files were compressed (and there's documentation around on how they're compressed), I am not much of a programmer and didn't have any tool to help me decompress the files. Yesterday though I realized that the function was included in CrystalTile2, a program that has been sitting on my desktop for some months but never got fully explored. Fail. Anyway, just right click a compressed overlay in CrystalTile's NDS filesystem explorer and you'll have the option of decompressing and saving it or opening a decompressed file and compressing it to that location. The process once you've got the decompressed overlay (#74) is easy enough; do a text search in a hex editor for AXVJ. It'll find a small list of game IDs for the 3rd gen pokemon games in which you can replace all J's with the letter corresponding to your language and vice versa. Save and compress/insert the edited overlay and you're good to go. Any 4th gen game can be hacked to accept any third gen game in a similar manner. Hope this is useful to someone! A big thanks to Mewtwo2000 who originally showed me how to do this for D/P.
-
 Hello its me, MasterKirby1982 again. It's been a long time since I posted something on this Pokemon site.. Anyways, I am going to teach you how to obey Mew and Deoxys in Pokémon FireRed/LeafGreen. Well... let's get started! How to obey Mew and Deoxys in Pokémon FireRed/LeafGreen. 1. Open a Hex Editor. 2. Search your Pokémon FireRed or LeafGreen version that you have and open it in your Hex Editor. 3. Here I put a list about the regions of Pokémon FireRed/LeafGreen except for the Japanese version. ---------------------------------------- For FireRed/LeafGreen - USA/English 1.0 version: For Mew, Go to the offset: x1D402 And change the 97 byte to 00. Then save it. For Deoxys, Go to the offset: x1D3EC And change the CD byte to 00. Then save it. ---------------------------------------- For FireRed/LeafGreen - USA/English 1.1 version: For Mew, Go to the offset: x1D416 And change the 97 byte to 00. Then save it. For Deoxys, Go to the offset: x1D400 And change the CD byte to 00. Then save it. ---------------------------------------- For Rojo Fuego/Verde Hoja - Español version: And, Rouge Feu/Vert Feuille - Française version: For Mew, Go to the offset: x1D372 And change the 97 byte to 00. Then save it. For Deoxys, Go to the offset: x1D35C And change the CD byte to 00. Then save it. ---------------------------------------- For Feurrote/Blattgrune - Deutsch version: And, Rosso Fuoco/Verde Foglia - Italiana version: For Mew, Go to the offset: x1D386 And change the 97 byte to 00. Then save it. For Deoxys, Go to the offset: x1D370 And change the CD byte to 00. Then save it. ---------------------------------------- 4. When you putt these values and save your game of Pokémon FireRed/LeafGreen in the Hex Editor.. Your Pokémon FireRed/LeafGreen ROM will be modified and then, the obedience problem that Mew and Deoxys have will disappear forever being solved/fixed of that error.. 5. Now you just have to play the game and try to meet a wild Mew or Deoxys. Here I have the codes for them: Wild Mew in the Grass FireRed/LeafGreen: USA/English 1.0 version B2AABF26 21876A02 A38F820C 1C572779 89E97F2B 6BAD3B49 ----------------------------------- FireRed/LeafGreen: USA/English 1.1 version AAA03B78 9758074E A38F820C 1C572779 89E97F2B 6BAD3B49 ----------------------------------- Rojo Fuego/Verde Hoja: Español version 6D02B612 794ECD5E A38F820C 1C572779 89E97F2B 6BAD3B49 ----------------------------------- Rouge Feu/Vert Feuille: Française version B74884C3 ADA6B1CC A38F820C 1C572779 89E97F2B 6BAD3B49 ----------------------------------- Feurrote/Blattgrune: Deutsche version 89C87307 2124084B A38F820C 1C572779 89E97F2B 6BAD3B49 ----------------------------------- Rosso Fuoco/Verde Foglia: Italiana version 3D431A27 6F0EE009 A38F820C 1C572779 89E97F2B 6BAD3B49 Wild Deoxys in the Grass FireRed/LeafGreen: USA/English 1.0 version B2AABF26 21876A02 A38F820C 1C572779 F21BADB2 284A02F4 ----------------------------------- FireRed/LeafGreen: USA/English 1.1 version AAA03B78 9758074E A38F820C 1C572779 F21BADB2 284A02F4 ----------------------------------- Rojo Fuego/Verde Hoja: Español version 6D02B612 794ECD5E A38F820C 1C572779 F21BADB2 284A02F4 ----------------------------------- Rouge Feu/Vert Feuille: Française version B74884C3 ADA6B1CC A38F820C 1C572779 F21BADB2 284A02F4 ----------------------------------- Feurrote/Blattgrune: Deutsche version 89C87307 2124084B A38F820C 1C572779 F21BADB2 284A02F4 ----------------------------------- Rosso Fuoco/Verde Foglia: Italiana version 3D431A27 6F0EE009 A38F820C 1C572779 F21BADB2 284A02F4 These are codes where Mew and Deoxys will appear in the grass and these will be examples to see if they obey you. The codes are ordered with their respective region in which game version or language you are playing. But hey... If you want to catch them... you have to have a Master or Ultra Balls if you want to catch them. Well.. here I end my explanation. I hope it has helped you solve your problem about these two Mythical Pokémon. See you later.
 -
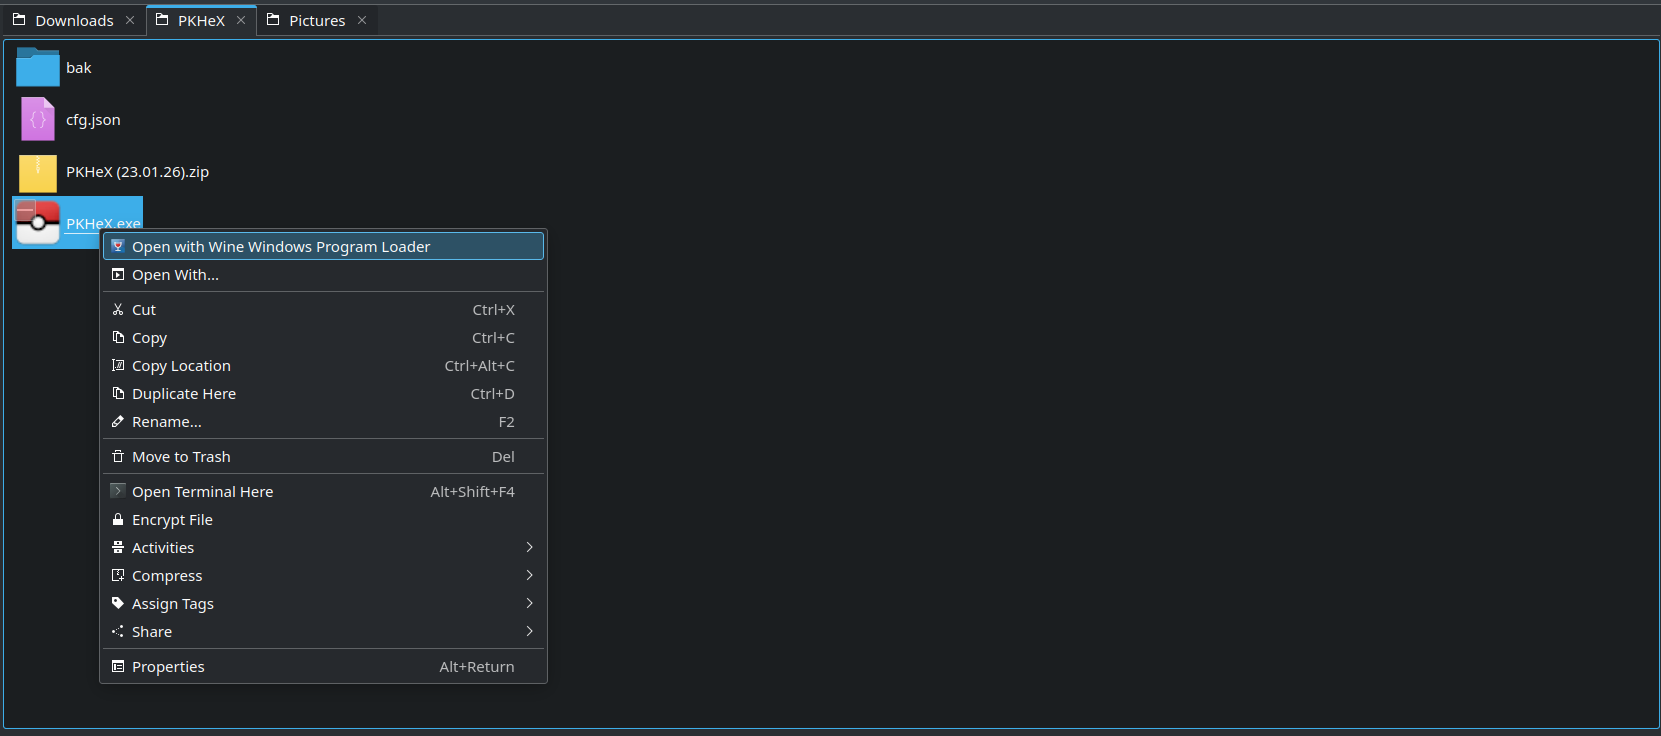
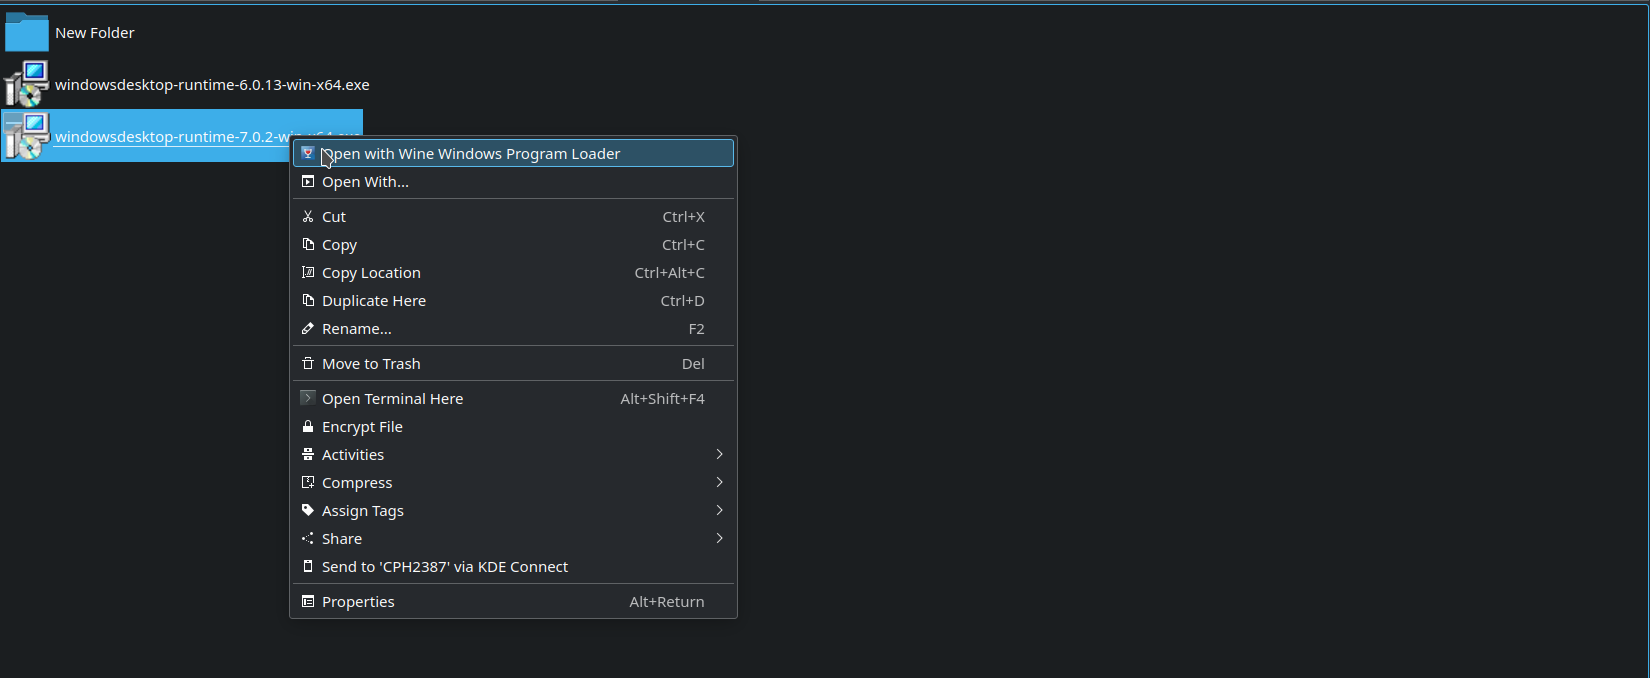
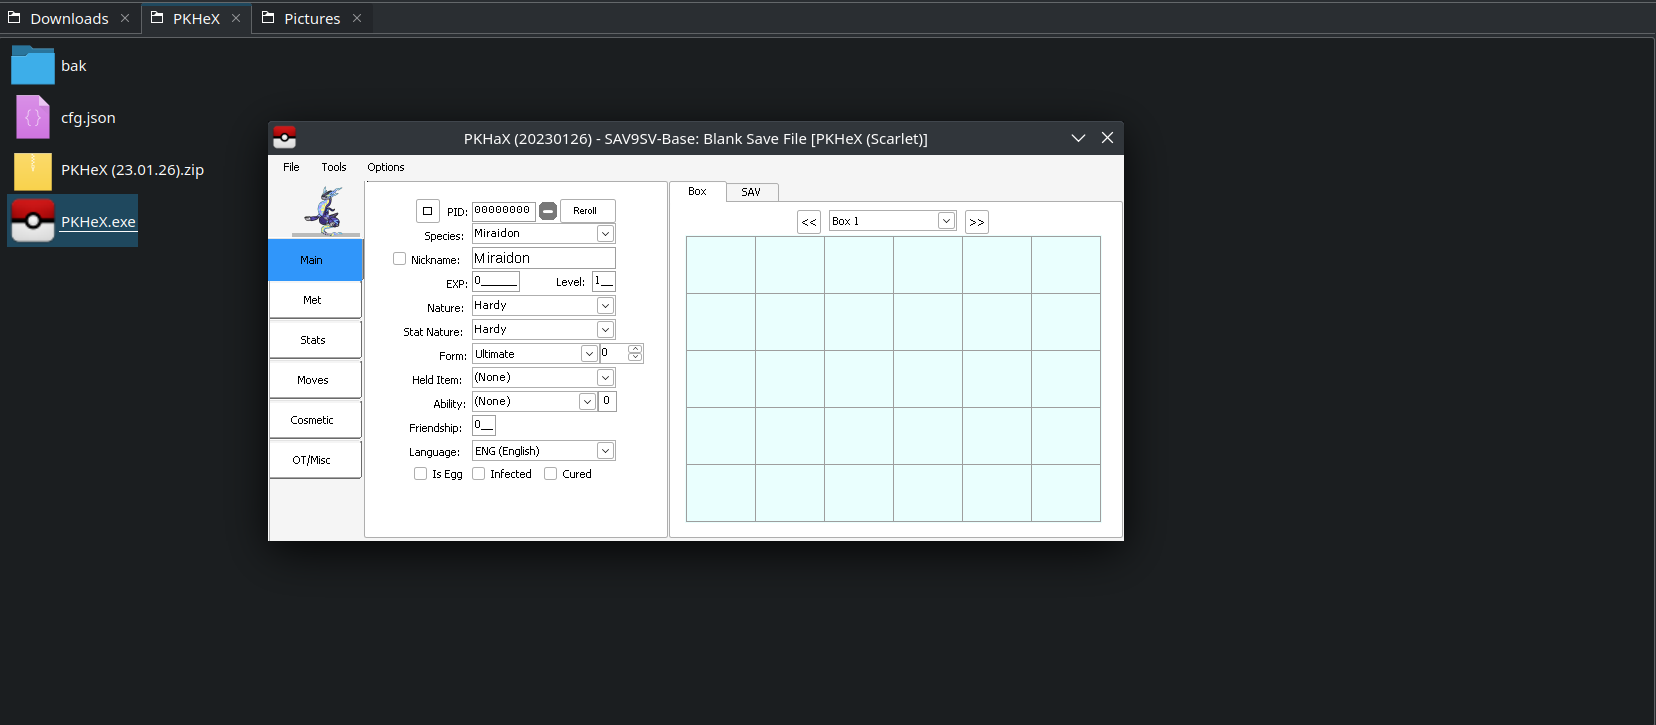
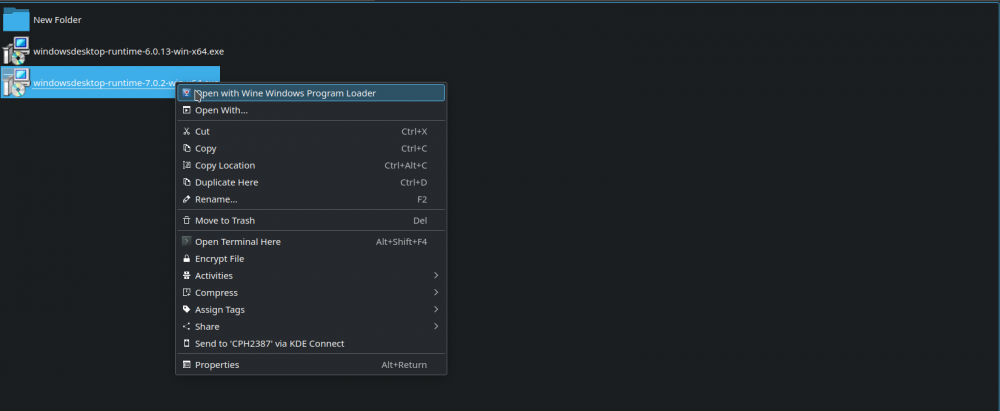
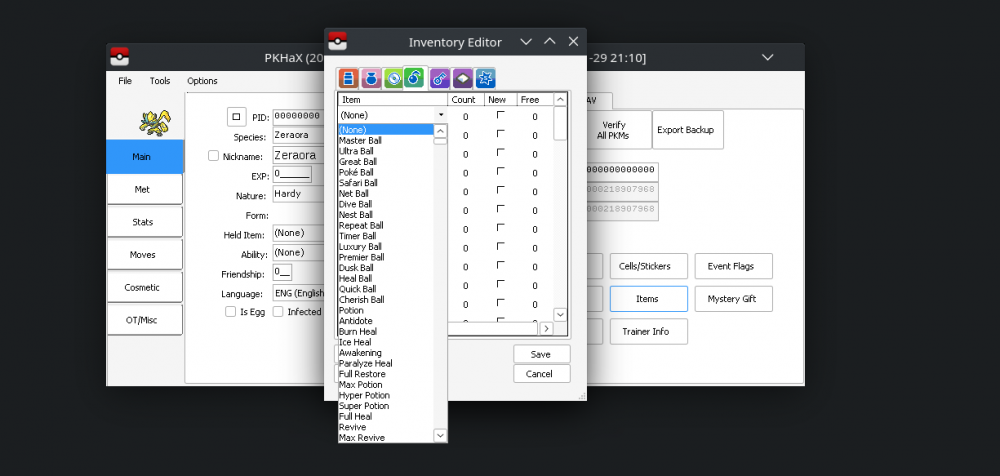
Ok, Preface first, I managed to run PKHeX on Linux, although I haven't test whether the edited save works or not because I didn't have my game atm. Anyways this (hopefully) should be foolproof, considering I'm one and I managed to do it.... Oh and another disclaimer, don't expect the GUI will be pretty. Btw, I'll try to be as concisely as possible, I'm on my phone writing this. 1. Install PlayOnLinux. It's hassle free Wine from my limited experience, no need to manually set prefix or the like. Foolproof. 2. Download PKHeX and extract the compressed file like you would on Windows. 3. Right click .exe and choose the first option. [please refer to scr1 image] 4. The program will tell you that you missing dotnet (insert dotnet version here) and offer to download it for you by opening your browser (should be legit, it's legit Microsoft website after all). 5. Open the downloaded dotnet using the same step of the 3 step [please refer to scr2 image] and proceed to install it like you would on windows. 6. Magic(?) [scr3 image] As you can see, the GUI doesn't seems displayed properly but hey, as long as it works some cosmetics imperfections can be overlooked. Btw, just like I said on first paragraph, I haven't test whether the edited save works or nah because I currently didn't have any Pokemon games on hand, but it should works. If you have any Pokemon save game file you can test and report. Hopefully this actually works and helping many people that currently on Linux. Edit: Tested on Ultra Sun. Editing Pokemon is working [scr4 image]. So far afaik the only problem that I've encountered is in inventory editor, instead limit the items per category if you pick item on the drop-down it shows all items, irregardless of choose category [scr5 image (even if I'm on berries category but the drop-down show all items, although the Give all give category specific items)]


-
 Is this possible, I want to actually be able to use my pokedex. And the data is already in-game. Is there a way to edit ORAS/XY/BW/BW2/PT/HG/SS to support these features? I want lbs to kg and feet/inches to proper meters. Anyone know if and how to do it? Thanks, searching yielded no results.
 -
 I've noticed there seems to be issues with extracting readable data from a Pokémon X/Y ROM. There are plenty of tools, like Ohana3DS and GARCTool, but they don't go together very well, and they don't support some file types. Therefore, I've posted a consolidated tutorial here for those of us who crave complete control over their data! All the files you need are in a ZIP file attached to this thread, save for the ROM because posting a 2 GB file would be a big no-no. You'll find a program labeled XObj (https://github.com/Quibilia/XObj) in the ZIP file. I wrote this program myself to examine the formats of the X/Y files and rename them accordingly. The copy of Ohana3DS Rebirth included in this ZIP file is a modified version designed to read the animations and textures in the ROM, which are containers of BCH files. I call it: Ohana3DS Transfigured! (https://github.com/Quibilia/Ohana3DS-Transfigured) The steps are as follows: 1. Run 3DS To CIA Converter.bat. Select option 5, then option 5 again. Type in the path to your ROM, and let it run. When the batch file tells you it's time to modify the files, close it. 2. Locate the subdirectory "romfs" where the batch file is stored. Enter it, and go into the subfolder "a". Copy (not move, COPY) everything in this folder to another folder labeled "XModels". The folder can be anywhere you want, as long as it's easy to get to. 3. Copy XObj.exe, GARC UnPacker.exe, and their accompanying batch files to the parent folder of XModels (if XModels is on your desktop, then your desktop), and run GARC.bat. This'll take a few minutes, so grab a soda. 4. When it's done, run XObj.exe, and it will look for any files that are compressed, and rename them to ".lz" files. Go into XModels, and enter the subdirectory "0/0/7.garc_". If there are no .lz files here, skip the next two steps. 5. Open Ohana3DS Rebirth.exe, and drag all of the .lz files into the window. They should be all grouped together in Windows Explorer (thanks, alphabetical order). It'll whir for a minute, and more likely than not stop responding, but let it run and it'll spit out some decompressed files. Go back into the parent folder of XModels, and run ClearCompressed.bat. This will delete all the compressed files, and leave the decompressed ones. Close Ohana3DS. 6. Run XObj again, and it'll convert each file in XModels to a format readable by our modified Ohana3DS. There are a lot of directories in XModels, but for this tutorial, we'll just be focusing on the files in 0/0/7.garc_, which hold the data for our favorite characters themselves. 7. Run ClearOriginals.bat, and it'll delete the original files, but leave the ones that we converted with XObj. 8. If you're looking for all of the models at once, here's where the real fun starts. Open Ohana3DS again, and go back into 0/0/7.garc_. Highlight all 8000-something files here, and drag them into the Ohana3DS window. The program will stop responding. After about five minutes, it should start responding again; when it does, the parent folder of XModels should be filled with .obj and .png files. Congratulations! You've successfully extracted all of the models and textures from your X/Y ROM. I'm still working out a conversion algorithm for the animations, but they should be convertible with Ohana3DS if you need them (just not with drag-drop support like the models and textures). 9. If you're looking for one or two models, I've outfitted Ohana3DS for that as well. Before dragging those 8000 files into the window, just go to the Open menu, and select a .PC file; this is a 3D model. From there, you can import textures in .PT format, or animations in .PB, .PK, or .PF formats. As for me, there are some questions I have about the animation files. It seems that all three formats contain more than one kind of animation, and they can be read pretty much the same way, so...what's the point in having more than one format? Also, if anyone could tell me where the skeletal animations are stored, I'd appreciate it. The material and visibility animations are stored along with the models, but the skeletal...they're hiding from me.
 -

answered How to do Extreme Randomizer for ORAS?
Azenroth posted a topic in ROM - 3DS Discussion & Help
Can anyone lay out a step-by-step process for doing the same type of extreme randomizer nuzlocke that TyrannitarTube did in this series (https://www.youtube.com/watch?v=MGIM7vfCzC8)? Myself and 3 friends want to do a soul link play through on top of the other challenges that TyrannitarTube did. I've already tried looking for this, but I couldn't find anything like this. It might just be that I didn't look hard enough, but here I am. We all already have the physical ORAS games so I'm pretty sure we don't need to get an illegal ROM or anything like that. I'm sure I'm not the only one wondering how to do this so helping us out with this would surely be a service to all of humanity. -
 So, as the title states, this is just a little tutorial on how to work around Illegal mode not changing the forms of Pokemon with Alternate Forms. It's actually really simple to do. You need to have two copies (just copy+paste the first one) of PKHeX (to make it faster) and you also need to know how to activate the hidden "illegal mode." You can look it up for yourself, however, if you do not know. The steps go as the following: 1. Open up PKHeX. 2. Create any Pokemon that has an alternate form in the alternate form you want it to be in. (Ex: Mega Charizard X) 3. Save that creation of yours. 4. Now open up the illegal mode PKHeX (Try looking up "PKHeX how to activate Illegal Mode" or something around those lines) and open up your previously saved file. The form will be retained, but don't change it to another form. (I honestly don't know what happens when that happens.) 5. Edit to your desire and overwrite the previously saved file when done. Note that this only applies to the Pokemon with alternate forms, like Rotom, All non-Mega Evolved Pokemon that are able to Mega Evolve, Kyurem, Keldeo, etc.
 -
 Complete title: Treat two different lines as the same species for breeding purposes Disclaimer: For now this goes for games in: English French German Spanish (SS only) We already have the Nidos and Volbeat+Illumise. This time we're going to add (not replace mind you) two new rules for breeding (males on the left, females on the right): the controversial Tauros+Miltank Gyarados+Milotic Decompress arm9.bin First we're going to change the pointer so that it points to the new piece of code, go to offset 0×6CA88 and change FFF7AEFE into 91F0F6FF At offset 0×FEA78 add this: F8 B5 84 B0 0D 1C 01 A9 00 90 6D F7 A1 FB 00 24 01 AF A6 00 B8 59 05 21 00 22 6F F7 D5 FD 61 00 03 AA 50 52 10 1C 40 5A 84 28 04 D1 01 20 60 40 28 70 6C 70 08 E0 B8 59 71 F7 6E FA 01 28 03 D1 01 20 2C 70 60 40 68 70 60 1C 00 04 04 0C 02 2C DF D3 28 78 41 00 03 A8 40 5A 72 F7 B3 FB 04 1C 1D 2C 09 D1 00 98 2A F7 15 FC 02 21 89 03 08 42 01 D0 20 24 00 E0 1D 24 F1 2C 09 D1 00 98 2A F7 09 FC 02 21 89 03 08 42 01 D0 80 24 00 E0 F1 24 1C 48 84 42 09 D1 00 98 2A F7 FC FB 02 21 89 03 08 42 01 D0 81 24 00 E0 16 4C 13 48 84 42 09 D1 00 98 2A F7 EF FB 02 21 89 03 08 42 01 D0 0F 4C 00 E0 0D 4C 0E 48 84 42 00 D1 44 1E 68 78 41 00 03 A8 40 5A 84 28 0B D1 28 78 81 00 01 A8 40 58 71 F7 1A FA 01 28 03 D0 69 78 28 78 68 70 29 70 20 1C 00 00 04 B0 F8 BD 3A 01 00 00 39 01 00 00 EA 01 00 00 5D 01 00 00 This is it, or it is? Not quite, remember that in gen IV if you try to breed male Nidoran / Volbeat with a Ditto the offspring will always be male. This is because the code checks when the offspring is female Nidoran or Illumise, if it is the case then the egg has a 50 % of hatching into either the species of the female or the species of the male. To fix this follow the following steps: Open your ROM in CrystalTile2 Extract the folder poketool/personal/pms.narc: This is what the game use to tell the offspring that the a given species of Pokémon will produce. We're going to change the following: 20 00 into 1D 00 (3 times) 80 00 into F1 00 (once) 81 00 into 5D 01 (twice) 39 01 into 3A 01 (once) Note: you can also give Tauros egg moves now.
 -
Main effect: The probability is PP/65536. PP is equal to 08 by default. You can now put the value 10 (16 chances in 65536), like in Gen VI. Decompress arm9.bin. Go to offset 0×70080* and change the value 08 into QQ. QQ can take any value from 00 (no shiny at all) to FF (roughly 1 in 257 chance). *Regions' differences: Language Shiny chance Japanese 0×6FAC0 Spanish HG 0×70078 Korean HG 0×7017C Korean SS 0×70174 Others 0×70080 Side-effect: Formula reminder: (Trainer ID ⊕ Secret ID) ⊕ (16 leftmost bits of PID ⊕ 16 rightmost bits of PID) = CID What I call the CID (stands for Color ID) must be a number between 0 and 7 included for its bearer to be shiny. For example let's say you decided to update the value from 0×08 to 0×10, what will happen you may ask? Any caught Pokémon who happens to have their CID between 8 and 15 included and who weren't shiny before the update will turn shiny!
-
Credits go to PowMikelan98 for discovering this and giving me permission to post this. Original post: http://wahackforo.com/t-21923-pag20#195 Open your HeartGold or SoulSilver ROM with CrystalTile2 Go to folder a/1/8/0 right-click and then click on sub-file sort. The data is 89 bytes for each Pokémon, the first bunch of data being that of Pokémon with ID 0. For example to go to the data of Milotic (ID 350), we do this simple operation: 350×89=31150 31150 is 79AE in hexadecimal, thus you add 79AE to 3C to get the relative address for Milotic's data. Note: first byte is labelled as byte 0, not byte 1. For each Pokémon: byte 1 governs the movement's type when a Pokémon is sent out (for example 0×13 (19) makes the Pokémon flash with electricity, like Raichu or Jolteon for example). byte 86 is the sprite's position on the Y-axis, a signed value who moves the sprite from 128 pixels down (80) to 127 pixels up (7F). byte 87 is the shadow's position on the X-axis, a signed value who moves the shadow from 128 pixels to the left (80) to 127 pixels to the right (7F). byte 88 is the shadow's size: 0=none 1=small 2=medium 3=big
-
Main feature Awwww… too bad that Deoxys' stats are not recalculated after each fight like in Gen III, otherwise I would have used that. First and foremost, you have to know that the game double-checks for the 100 EV limit: the first check is triggered by the corresponding vitamin, the second check is run no matter the used vitamin. Now we choose a value to replace 64 (100) with, might as well use FC (252) for convenience's sake. Here's how you proceed to lift the limit: Decompress arm9.bin Case-by-case checks Go to offset 0×90034* and change the value 64 into FC, this is the check for the HP Up Go to offset 0×900A0* and change the value 64 into FC, this is the check for the Protein Go to offset 0×9010C* and change the value 64 into FC, this is the check for the Iron Go to offset 0×9017A* and change the value 64 into FC, this is the check for the Carbos Go to offset 0×901E8* and change the value 64 into FC, this is the check for the Calcium Go to offset 0×90254* and change the value 64 into FC, this is the check for the Zinc * Regions' differences Language Offset 1 Offset 2 Offset 3 Offset 4 Offset 5 Offset 6 Japanese 0×8F910 0×8F97C 0×8F9E8 0×8FA56 0×8FAC4 0×8FB30 Spanish HG 0×9002C 0×90098 0×90104 0×90172 0×901E0 0×9024C Korean HG 0×90728 0×90794 0×90800 0×9086E 0×908DC 0×90948 Korean SS 0×90720 0×9078C 0×907F8 0×90866 0×908D4 0×90940 Others 0×90034 0×900A0 0×9010C 0×9017A 0×901E8 0×90254 [*]Global check Go to offset 0×90A96* and change the value 64 into FC Do the same at offset 0×90ABC* and offset 0×90AC0* * Regions' differences Language Offset 1 Offset 2 Offset 3 Japanese 0×90372 0×90398 0×9039C Spanish HG 0×90A8E 0×90AB4 0×90AB8 Korean HG 0×9118A 0×911B0 0×911B4 Korean SS 0×91182 0×911A8 0×911AC Others 0×90A96 0×90ABC 0×90AC0 Bonus feature 1: Change how many EV are given by each vitamin Open the folder a/0/1/7. The amount of EV added for one given stat W by its respective vitamin X is located at byte Y on file Z. Stat Vitamin Byte File (W) (X) (Y) (Z) HP HP Up 21 45 Attack Protein 22 46 Defense Iron 23 47 Speed Carbos 24 48 Sp.Atk. Calcium 25 49 Sp.Def. Zinc 26 52 Note: First byte is assumed to be byte 0, not byte 1. That byte always has a value of 10 (0A), it's a signed value who can subtract as much as 128 EV (80) or add as much as 127 EV (7F). We're going to change that value to one who can divide 252 (FC) while staying very close to 10 (0A). Why not 12 (0C)? But what if you want to put EV not divisible by 12 in one particular stat? Well, that's what EV-reducing Berries are for Since the Vitamins are set up to give 12 EV now, it means the modulo applied here is a modulo 12. But at Lv.100 1 point in a stat equals 4 EV, thus we have to apply a modulo 3 instead (12/4). Modulo 3 is 0 => remainder of Wanted_EV/12 is 0 => no correction needed. Modulo 3 is 1 => remainder of Wanted_EV/12 is 4 => give 2 Vitamins (+24) and then 2 EV-reducing Berries (-20). Modulo 3 is 2 => remainder of Wanted_EV/12 is 8 => give 4 Vitamins (+48) and then 4 EV-reducing Berries (-40). Don't forget this is meant as an emergency feature to give the player a mean to EV-train a Lv.100 Pokémon, hence why you are allowed to complicate the feature. Bonus feature 2: Lower the EV limit from 255 to 252 Yep, we're borrowing that feature from Gen VI. Decompress overlay9_0012.bin. Go to offset 0×EC9C* and change the value FF into FC. Do the same at offset 0×ECA0*. * Regions' differences Language Offset 1 Offset 2 Japanese 0×ECA4 0×ECA8 Korean 0×ECA0 0×ECA4 Others 0×EC9C 0×ECA0 Decompress arm9.bin. Go to offset 0×4B948* and change the value FF into FC. Do the same at offset 0×4B94C*. * Regions' differences Language Offset 1 Offset 2 Japanese 0×4B3DC 0×4B3E0 Spanish HG 0×4B940 0×4B944 Korean HG 0×4BA44 0×4BA48 Korean SS 0×4BA3C 0×4BA40 Others 0×4B948 0×4B94C
-
I wasn't kidding when I said that I had a load of tutorials to write down. Decompress arm9.bin Go to offset 0×FF4AE* You should see this: 68 01 FF 00 CA 00 2A 01 FE 00 B7 00 B7 01 3A 01 7A 00 B6 01 3B 01 B9 00 BE 01 3C 01 8F 00 CA 01 3D 01 E2 00 96 01 3E 01 3B 01 B8 01 3F 01 71 00 B1 01 40 01 66 01 Format is BB BB II II DD DD. BB BB is the baby produced when at least one parent holds the corresponding item. II II is the item that at least one parent has to hold. DD DD is the default baby when none of the parent holds the corresponding item. For example we’re going to dissect the 7th row, shall we? 96 01 is a Pokémon ID. Invert the 2 bytes and you get 01 96. Converting from base 16 to base 10 we get 406. Oh, it’s Budew! This is the same principle with the item ID and the default baby ID. Item ID: 3E 01 => 01 3E => 318 => Rose Incense Default baby ID: 3B 01 => 01 3B => 315 => Roselia The instruction is as follows: If at least one of the Parents hold the Rose Incense, Budew will hatch from the egg, otherwise Roselia hatch from the egg. So if you have understood, it means we basically have to replace all 9 instances of DD DD by their corresponding BB BB. By changing the aforementioned bytes you get this: 68 01 FF 00 68 01 2A 01 FE 00 2A 01 B7 01 3A 01 B7 01 B6 01 3B 01 B6 01 BE 01 3C 01 BE 01 CA 01 3D 01 CA 01 96 01 3E 01 96 01 B8 01 3F 01 B8 01 B1 01 40 01 B1 01 Neat, now how about you go and hatch that Budew without a Rose Incense, hum? * Regions’ differences: Language Offset Japanese 0×FFEC2 English 0×FF4AE French 0×FF492 German 0×FF462 Italian 0×FF426 Spanish HG 0×FF496 Spanish SS 0×FF49E Korean HG 0×FFB5A Korean SS 0×FFB52
-
I know, I'm on thread-spree lately, and it's not over since I have at least 4 more tutorials to get down! Disclaimer: Read all the paragraph before attempting any manipulation. Decompress overlay9_0012.bin Go to the very bottom of the file You should see something like that: 2D 00 2E 00 2F 00 30 00 67 00 AD 00 FD 00 3F 01 40 01 30 01 95 01 C0 01 Q: What are those? A: Those are the very moves blocked by Soundproof. Each move is 2 bytes long, for example let’s try this one: 30 01. Invert the 2 bytes and you get 01 30. Now convert from hex to decimal and you get 304. 304 is the ID number for the move Hyper Voice! Well what move are we trying to break already? Oh yes, Heal Bell. So the move Heal Bell has been assigned the ID number 215. Okay 215 in hexadecimal is D7, since moves are 2 bytes long instead let’s go with 00 D7. Invert the 2 bytes and you get D7 00. Time to go and check against the previous string… … … HEY! But there’s no bytes equal to D7 00 in there! Explanation: Actually this string lists the moves blocked by an opponent’s Soundproof! Have you ever tried to use Heal Bell against that Exploud? Believe it or not but it will work. When it comes to the move Heal Bell, the game will instead perform a check against all of your team members’ abilities, and if a Pokémon affected by a major status condition happens to have Soundproof, it will not be healed. Tough luck, huh? But this will come to an end with those simple-to-follow steps. Decompress overlay9_0012.bin Go to offset 0×98A0* and change the value D7 into 00 Do the same at offset 0×21ADE* Go to offset 0×98B0* and change the value 2B into FF (anything between 7C and FF included will do the trick) Do the same at offset 0×9906* and offset 0×21AE4* Offset 0×98A0 is the check for Heal Bell’s execution for the Pokémon on the battlefield, on the side of the Heal Bell’s user. Offset 0×21ADE is the check for Heal Bell’s execution for the remaining team members of the Heal Bell’s user team. Offset 0×98B0 is the check for Soundproof against the Heal Bell’s user. Offset 0×9906 is the check for Soundproof against the teammate of the Heal Bell’s user (Double battle only). Offset 0×21AE4 is the check for Soundproof against the remaining team members of the Heal Bell user’s team. Basically the new instruction is: check if [Pokémon] used move with ID 0 and check for every instance of ability with ID 255. Note: You shouldn’t replace 2B by 00, because the ability with ID number 0 is used in-game when an ability gets cancelled (Gastro Acid comes to mind), whereas you can replace D7 by 00 since there is no legitimate way to get the move with ID number 0. * Regions’ differences: Language Offset 1 Offset 2 Offset 3 Offset 4 Offset 5 Japanese 0×98A8 0×98B8 0×990E 0×21AE6 0×21AEC Korean 0×98A4 0×98B4 0×990A 0×21AE2 0×21AE8 Others 0×98A0 0×98B0 0×9906 0×21ADE 0×21AE4
-
So today we're going to restore the missing code needed to evolve some Pokémon by leveling them up in a specific location. More specifically Eevee into Leafeon, Eevee into Glaceon, Magneton into Magnezone and Nosepass into Probopass. As it is, there's currently no way to obtain those evolutions on a retail card without trading them to DPPt. This is the code for the location-specific evolution (this comes from Platinum btw): 07 4B 00 22 19 88 88 42 04 D1 50 1C 41 00 04 48 40 5A 70 47 92 1C 1B 1D [b][u]YY[/u][/b] 2A F3 D3 00 20 70 47 [b][u]XX XX XX XX[/u][/b] XX XX XX XX is the offset for the following data : 81 01 1A 00 CB 00 19 00 CF 00 18 00 D0 00 18 00 D1 00 18 00 D2 00 18 00 D3 00 18 00 D4 00 18 00 D5 00 18 00 D6 00 18 00 D7 00 18 00 D8 00 18 00 D9 00 18 00 DA 00 18 00 DB 00 18 00 DC 00 18 00 DD 00 18 00 FE 01 18 00 FF 01 18 00 48 02 18 00 49 02 18 00 Format is MM MM EE EE MM MM is the map number EE EE is the evolution method For example the first 4 bytes are read like this: 81 01 => 01 81 => map 385 which is Route 217 (oustide) 1A 00 => 00 1A => evolution method 26 which is used to evolve Eevee into Glaceon Ergo if you level up Eevee on Route 217, it will evolve into Glaceon. YY is the total of map-related evolution, times 2. Map-related evolutions are 4 bytes long each, the total is 84 bytes long. 84 / 4 = 21 Then multiply by 2. 21 × 2 = 42 42 is 2A in hex, thus in Pokémon Platinum YY is equal to 2A. As surprising as it may be, the function still exists in HGSS, or rather the leftovers. So how are we going to restore the code ? Step 1: Open Pokémon HG or SS with CrystalTile2. Step 2: Decompress the arm9 by right-clicking and then selecting Extract(U). Step 3: We're going to search for a place to fit in the new code, a place with enough unused FF FF should do the trick. Why not for example the address 0×11025C ? Step 4: Copy and paste this string: 07 4B 00 22 19 88 88 42 04 D1 50 1C 41 00 04 48 40 5A 70 47 92 1C 1B 1D [b][u]12[/u][/b] 2A F3 D3 00 20 70 47 [b][u]C8 02 11 02[/u][/b] Step 5: We need to paste the new map-data too. But wait a second, none of Leafeon, Glaceon, Magnezone or Probopass are listed in the Johto Dex! To alleviate that issue, map-specific evolution are going to be Kanto-only. Eevee into Leafeon : Virdian Forest (that one is a given) Eevee into Glaceon : Seafoam Islands except the Gym part (again, a given) Magneton into Magnezone and Nosepass into Probopass : Route 10 and Power Plant (reasoning being that Power Plant used to be home to Magnemite and Magneton) That makes for 9 maps in total, thus 36 bytes in total, hence why YY in this code is equal to 12. Copy and paste this string at address 0×1102C8 (thus XX XX XX XX is equal to C8 02 11 02 which is 021102C8 in little-endian): 92 00 1A 00 C5 01 1A 00 C6 01 1A 00 C7 01 1A 00 C8 01 1A 00 93 00 19 00 12 00 18 00 84 01 18 00 D3 01 18 00 Step 6: A problem arises, there are 3 routines who use a Branch linking to the map-evo function, thus we have to modify the pointers: Go to address 0×3CE04 and change FEFC02FC into D3F02AFA. Go to address 0×51E5C and change E9F7D6FB into BEF0FEF9. Go to address 0×81E6E and change B9F7CDFB into 8EF0F5F9. This is only for English versions for now, I will eventually update with offsets for all regions. Step 7: Save your modified arm9 and close the Hex editor. Step 8: Reinsert the arm9 into your ROM. Now you won't need to transfer the aforementioned Pokémon to DPPt with this trick, so go and evolve that Eevee / Magnemite / Nosepass.
- 1 reply
-
- 1
-

-
I figured out how to get PKHex working on Linux using Wine and thought I would share my info. I'm on Ubuntu 14.04 64bit using the stock repo version of Wine. First off you have a have a 32bit Wine environment which doesn't seem to be the default if your system is 64bit so you may have to move or delete your .wine directory. All you have to do is run this command to setup Wine WINEARCH='win32' winetricks dotnet40
-
DISCLAIMER: As of now, this is only a beta (revision 4 since the Pokémon summary freeze fix), but at the very least the type chart works. NEW: Download link at the bottom of this post! You read it right, we're going to make the game take into account the Fairy-type! Also, STAB works too. But keep in mind this is still primitive and the Hall of Fame freeze on a NDS need to be addressed ASAP. While it may seem it is a one-man project, it is not; anyone who knows how to ameliorate the code or knows something useful is a welcome guest (credits will be given where they are due obviously). Part 1: Extraction Step 1: First and foremost open your Pokémon Black 2 or White 2 ROM with CrystalTile2. Step 2: Click the NDS icon (or alternatively click Ctrl+N). Step 3: Right-click on each of the following files and click Extract. arm9.bin overlay9_0167.bin overlay9_0168.bin overlay9_0207.bin overlay9_0265.bin Likewise, right-click on each of the following files and click Export. a/0/1/1 a/0/8/2 a/1/2/5 a/2/1/3 Note 1: File Reinsertion will be done on the last Part. Note 2: As a rule of thumb, overlays, arm9 and fat are NOT interchangeable between versions, but narcs are safe. Part 2: Updated type chart Step 1: Open overlay 167 with an Hex editor. Step 2: Add this at the beginning of overlay 167, yes by that I mean to add (not replace) this at offset 0×0: 04 04 04 04 04 02 04 00 02 04 04 04 04 04 04 04 04 04 08 04 02 02 04 08 02 00 08 04 04 04 04 02 08 04 08 02 04 08 04 04 04 02 08 04 02 04 04 08 02 04 04 04 04 04 04 04 04 02 02 02 04 02 00 04 04 08 04 04 04 04 04 08 04 04 00 08 04 08 02 04 08 08 04 02 08 04 04 04 04 04 04 02 08 04 02 04 08 04 02 08 04 04 04 04 08 04 04 04 04 02 02 02 04 04 04 02 02 02 04 08 04 08 04 04 08 02 00 04 04 04 04 04 04 08 04 04 04 04 04 08 04 04 02 04 04 04 04 04 04 08 04 04 02 02 02 04 02 04 08 04 04 08 04 04 04 04 04 02 08 04 08 02 02 08 04 04 08 02 04 04 04 04 04 04 08 08 04 04 04 08 02 02 04 04 04 02 04 04 04 04 02 02 08 08 02 04 02 02 08 02 04 04 04 02 04 04 04 04 08 04 00 04 04 04 04 04 08 02 02 04 04 02 04 04 04 08 04 08 04 04 04 04 02 04 04 04 04 02 04 04 00 04 04 04 08 04 08 04 04 04 02 02 02 08 04 04 02 08 04 04 04 04 04 04 04 04 04 04 02 04 04 04 04 04 04 08 04 00 04 02 04 04 04 04 04 08 04 04 04 04 04 08 04 04 02 02 04 08 04 02 04 04 04 04 02 02 04 04 04 04 04 08 08 04 FF FF FF FF FF FF FF FF FF FF FF FF FF FF FF FF FF FF FF FF FF FF FF FF FF FF FF FF FF FF FF FF FF FF FF FF FF FF FF FF FF FF FF FF FF FF FF FF FF FF FF FF FF FF FF FF FF FF FF FF Step 3: After inserting the new type-chart, change the following: 0×0C312 : 112A 08D0 => 122A 08DA 0×11226 : 1128 02D1 => 1228 02DB 0×21884 : 11 => 12 0×21896 : 11 => 12 0×218A2 : 1129 06D1 => 1229 06DB 0×218A6 : 1128 01D1 => 1228 01DB 0×218B4 : 1128 00D1 => 1228 00DB 0×218DA : 112C 0ED0 => 122C 0EDA 0×23A20 : 1128 01D0 => 1228 01DA 0×23A24 : 1129 01D1 => 1229 01DB 0×23A2C : 0201 8218 => 1222 4243 0×23B98 : 11 => 12 0×260E2 : 112E 1ED0 => 122E 1EDA 0×306F0 : 112C 3CD0 => 122C 3CDA 0×306F6 : 11 => 12 0×23A6C (B2) : 00751D02 => 40971902 (W2) : 40751D02 => 80971902 0×23BA4 (B2) : 00751D02 => 40971902 (W2) : 40751D02 => 80971902 Step 4: Save the changes done on overlay 167. The file size should go from 268,096 bytes to 268,480 bytes. Part 3: Fairy-type icon Step 1: Open a/0/8/2 with an Hex editor. Step 2: Go to offset 0×6A84 and change 1F7C1F7C into 9CF20EB9. What you did here is a change to the type-icons' palette so that it takes into account the colors for the Fairy-type. Step 3: Go to offset 0×8094 and change this: 00 00 00 00 10 11 11 11 21 22 22 22 22 22 22 22 22 22 22 FF 22 22 F2 EE 22 22 F2 2E 22 22 F2 2E 00 00 00 00 11 11 11 11 22 22 22 22 22 22 22 22 2E 22 FF 2E EF F2 EE EF EE F2 2E EF 22 F2 2E EF 00 00 00 00 11 11 11 11 22 22 22 22 22 22 22 22 22 FF 2E F2 F2 EE EF F2 F2 2E EF F2 F2 2E EF F2 00 00 00 00 11 11 11 01 22 22 22 12 22 22 22 22 2E 22 22 22 2E 22 22 22 2E 22 22 22 2E 22 22 22 22 22 F2 2E 22 22 F2 2E 22 22 E2 FF 22 22 22 EE 22 22 22 22 23 22 22 22 30 33 33 33 00 00 00 00 22 F2 2E EF EF F2 2E EF EE E2 FF EE 2E 22 EE 2E 22 22 22 22 22 22 22 22 33 33 33 33 00 00 00 00 F2 2E EF F2 F2 2E EF F2 E2 FF EE F2 22 EE 2E E2 22 22 22 22 22 22 22 22 33 33 33 33 00 00 00 00 2E 22 22 22 2E 22 22 22 FF EF 22 22 EE EE 22 22 22 22 22 22 22 22 22 32 33 33 33 03 00 00 00 00 into this: 00 00 00 00 00 00 00 00 99 99 99 99 89 88 88 88 89 88 FF FF 89 88 EF EE 89 88 EF 88 89 88 FF EF 00 00 00 00 00 00 00 00 99 99 99 99 88 88 88 88 8E FF 8E FF FE EE EF FE F8 8E EF F8 F8 8E EF F8 00 00 00 00 00 00 00 00 99 99 99 99 88 88 88 88 EF FF EF F8 EE EF FE FE 8E EF F8 EE 8E FF EF 88 00 00 00 00 00 00 00 00 99 99 99 99 88 88 88 98 8E F8 8E 98 8E F8 8E 98 EF EF 88 98 FE 8E 88 98 89 88 EF EE 89 88 EF 88 89 88 EF 88 89 88 EE 88 89 88 88 88 99 99 99 99 00 00 00 00 00 00 00 00 F8 FF EF F8 F8 EE EF F8 F8 8E EF FF E8 8E EE EE 88 88 88 88 99 99 99 99 00 00 00 00 00 00 00 00 8E EF EF 88 8E EF FE 8E EF EF F8 8E EE EE E8 8E 88 88 88 88 99 99 99 99 00 00 00 00 00 00 00 00 F8 8E 88 98 F8 8E 88 98 F8 8E 88 98 E8 8E 88 98 88 88 88 98 99 99 99 99 00 00 00 00 00 00 00 00 in other words (or rather images), into . Step 4: Save the changes done on a/0/8/2. Step 5: Open a/1/2/5 with an Hex editor. Step 6: Go to offset 0×BCB8 and change 1F7C1F7C into 9CF20EB9. Step 7: Go to offset 0×CF98 and change this: 00 00 00 00 00 00 00 00 33 33 33 33 43 44 44 44 43 44 44 44 43 44 44 F4 43 44 44 F4 43 44 44 44 00 00 00 00 00 00 00 00 33 33 33 33 44 44 44 44 FF 4E 44 F4 EE EF 44 EF 4E EF 44 EF F4 4E 44 44 00 00 00 00 00 00 00 00 33 33 33 33 44 44 44 44 EF 44 44 FF FE 4E F4 EE F4 4E F4 4E EF 44 44 F4 00 00 00 00 00 00 00 00 33 33 33 33 44 44 44 34 4E 44 44 34 EF 44 44 34 EF 44 44 34 4E 44 44 34 43 44 44 44 43 44 44 44 43 44 44 44 43 44 44 44 43 44 44 44 33 33 33 33 00 00 00 00 00 00 00 00 F4 4E 44 44 E4 4E 44 44 F4 4E 44 44 E4 4E 44 44 44 44 44 44 33 33 33 33 00 00 00 00 00 00 00 00 EF 44 44 F4 EE 44 44 E4 EF 44 44 F4 EE 44 44 E4 44 44 44 44 33 33 33 33 00 00 00 00 00 00 00 00 4E 44 44 34 4E 44 44 34 4E 44 44 34 4E 44 44 34 44 44 44 34 33 33 33 33 00 00 00 00 00 00 00 00 into this: 00 00 00 00 00 00 00 00 99 99 99 99 89 88 88 88 89 88 FF FF 89 88 EF EE 89 88 EF 88 89 88 FF EF 00 00 00 00 00 00 00 00 99 99 99 99 88 88 88 88 8E FF 8E FF FE EE EF FE F8 8E EF F8 F8 8E EF F8 00 00 00 00 00 00 00 00 99 99 99 99 88 88 88 88 EF FF EF F8 EE EF FE FE 8E EF F8 EE 8E FF EF 88 00 00 00 00 00 00 00 00 99 99 99 99 88 88 88 98 8E F8 8E 98 8E F8 8E 98 EF EF 88 98 FE 8E 88 98 89 88 EF EE 89 88 EF 88 89 88 EF 88 89 88 EE 88 89 88 88 88 99 99 99 99 00 00 00 00 00 00 00 00 F8 FF EF F8 F8 EE EF F8 F8 8E EF FF E8 8E EE EE 88 88 88 88 99 99 99 99 00 00 00 00 00 00 00 00 8E EF EF 88 8E EF FE 8E EF EF F8 8E EE EE E8 8E 88 88 88 88 99 99 99 99 00 00 00 00 00 00 00 00 F8 8E 88 98 F8 8E 88 98 F8 8E 88 98 E8 8E 88 98 88 88 88 98 99 99 99 99 00 00 00 00 00 00 00 00 Which will transform into . Step 8: Save the changes done on a/1/2/5. Step 9: Open arm9.bin with an Hex editor. Step 10: Go to offset 0×8E09D (B2) / 0×8E0C9 (W2) and change 00 into 02. Step 11: Save the changes done on arm9.bin. Part 4: Fairy-type template Step 1: Open a/0/1/1 with NDSeditor. Step 2: Double-click the file to open this window. Step 3: Tick the box and click on the leftmost icon (Extract selected) NDSeditor will extract all the files in the same folder a/0/1/1 is located at. Step 4: Move a/0/1/1 out of the folder so that only the extracted files stays. Step 5: Copy file a/0/1/1-570 (or any file ending with .rlcn) and rename it a/0/1/1-572. This will be our palette for the Fairy-type template. Step 6: Open file 572 in a Hex editor. Step 7: Wipe out the contents and paste this: 52 4C 43 4E FF FE 00 01 28 02 00 00 10 00 01 00 54 54 4C 50 18 02 00 00 03 00 00 00 00 00 00 00 00 02 00 00 10 00 00 00 CD 75 29 25 08 21 E7 1C C6 18 A5 14 84 10 63 0C 7D EE 5B 66 39 5E F6 D5 D4 C9 B1 41 1F 7C 00 00 00 00 00 00 00 00 00 00 00 00 00 00 00 00 00 00 00 00 00 00 00 00 00 00 00 00 00 00 00 00 00 00 00 00 00 00 00 00 00 00 00 00 00 00 00 00 00 00 00 00 00 00 00 00 00 00 00 00 00 00 00 00 00 00 00 00 00 00 00 00 00 00 00 00 00 00 00 00 00 00 00 00 00 00 00 00 00 00 00 00 00 00 00 00 00 00 00 00 00 00 00 00 00 00 00 00 00 00 00 00 00 00 00 00 00 00 00 00 00 00 00 00 00 00 00 00 00 00 00 00 00 00 00 00 00 00 00 00 00 00 00 00 00 00 00 00 00 00 00 00 00 00 00 00 00 00 00 00 00 00 00 00 00 00 00 00 00 00 00 00 00 00 00 00 00 00 00 00 00 00 00 00 00 00 00 00 00 00 00 00 00 00 00 00 00 00 00 00 00 00 00 00 00 00 00 00 00 00 00 00 00 00 00 00 00 00 00 00 00 00 00 00 00 00 00 00 00 00 00 00 00 00 00 00 00 00 00 00 00 00 00 00 00 00 00 00 00 00 00 00 00 00 00 00 00 00 00 00 00 00 00 00 00 00 00 00 00 00 00 00 00 00 00 00 00 00 00 00 00 00 00 00 00 00 00 00 00 00 00 00 00 00 00 00 00 00 00 00 00 00 00 00 00 00 00 00 00 00 00 00 00 00 00 00 00 00 00 00 00 00 00 00 00 00 00 00 00 00 00 00 00 00 00 00 00 00 00 00 00 00 00 00 00 00 00 00 00 00 00 00 00 00 00 00 00 00 00 00 00 00 00 00 00 00 00 00 00 00 00 00 00 00 00 00 00 00 00 00 00 00 00 00 00 00 00 00 00 00 00 00 00 00 00 00 00 00 00 00 00 00 00 00 00 00 00 00 00 00 00 00 00 00 00 00 00 00 00 00 00 00 00 00 00 00 00 00 00 00 00 00 00 00 00 00 00 00 00 00 00 00 00 00 00 00 00 00 00 00 00 00 00 00 00 00 00 00 00 00 00 00 00 00 00 00 00 00 00 00 00 00 00 00 00 00 00 00 00 00 00 00 Step 8: Save and close your Hex editor. Step 9: On NDSeditor, click Tools and 'Make Narc file' Step 10: Select the folder where your extracted files are located and click OK. Step 11: Close NDSeditor. Step 12: Open overlay 168 with your Hex editor. Step 13: Go to offset 0×15E48 and change 0000 into 3C02. Step 14: (optional) Go to offset 0×13F0A and change 0127 into 0000. This will disable the 'Low HP' music, which I personally don't like for killing the 'tension' of fights. Step 15: Save the changes done on overlay 168. End-results: => Part 5: Hall of Fame Explanation: Step 1: Open overlay 265 with your Hex editor. Step 2: Go to offset 0×06B4 and change: CC(B81902) into C8(B81902) if B2; 0C(B91902) into 08(B91902) if W2; Step 3: Go to offset 0×2008 and change this: 00 00 00 00 2D 00 00 00 26 00 00 00 28 00 00 00 2E 00 00 00 2B 00 00 00 30 00 00 00 22 00 00 00 29 00 00 00 31 00 00 00 27 00 00 00 32 00 00 00 2A 00 00 00 25 00 00 00 2F 00 00 00 2C 00 00 00 24 00 00 00 23 00 00 00 into this: 2D 00 00 00 26 00 00 00 28 00 00 00 2E 00 00 00 2B 00 00 00 30 00 00 00 22 00 00 00 29 00 00 00 31 00 00 00 27 00 00 00 32 00 00 00 2A 00 00 00 25 00 00 00 2F 00 00 00 2C 00 00 00 24 00 00 00 23 00 00 00 [u]XX[/u] 00 00 00 What you did there really is a circular shift by 32 bits to the left, no more no less. XX can be any value between 0×22 and 0×32. Step 4: Go to offset 0×21DC and change 09 into 04. Go to offset 0×221C and change 00 into 09. Step 5: Save the changes done on overlay 265. Step 6: Open a/2/1/3 in a Hex editor. Step 7: Go to offset 0×513C and paste this: 52 4C 43 4E FF FE 00 01 28 02 00 00 10 00 01 00 54 54 4C 50 18 02 00 00 03 00 00 00 00 00 00 00 00 02 00 00 10 00 00 00 87 1A 9C 72 F5 55 B2 49 6F 3D 2D 35 EA A8 A7 9C 65 94 22 88 00 00 1F 7C 1F 7C 1F 7C 1F 7C 1F 7C 00 00 00 00 00 00 00 00 00 00 00 00 00 00 00 00 00 00 00 00 00 00 00 00 00 00 00 00 00 00 00 00 00 00 00 00 00 00 00 00 00 00 00 00 00 00 00 00 00 00 00 00 00 00 00 00 00 00 00 00 00 00 00 00 00 00 00 00 00 00 00 00 00 00 00 00 00 00 00 00 00 00 00 00 00 00 00 00 00 00 00 00 00 00 00 00 00 00 00 00 00 00 00 00 00 00 00 00 00 00 00 00 00 00 00 00 00 00 00 00 00 00 00 00 00 00 00 00 00 00 00 00 00 00 00 00 00 00 00 00 00 00 00 00 00 00 00 00 00 00 00 00 00 00 00 00 00 00 00 00 00 00 00 00 00 00 00 00 00 00 00 00 00 00 00 00 00 00 00 00 00 00 00 00 00 00 00 00 00 00 00 00 00 00 00 00 00 00 00 00 00 00 00 00 00 00 00 00 00 00 00 00 00 00 00 00 00 00 00 00 00 00 00 00 00 00 00 00 00 00 00 00 00 00 00 00 00 00 00 00 00 00 00 00 00 00 00 00 00 00 00 00 00 00 00 00 00 00 00 00 00 00 00 00 00 00 00 00 00 00 00 00 00 00 00 00 00 00 00 00 00 00 00 00 00 00 00 00 00 00 00 00 00 00 00 00 00 00 00 00 00 00 00 00 00 00 00 00 00 00 00 00 00 00 00 00 00 00 00 00 00 00 00 00 00 00 00 00 00 00 00 00 00 00 00 00 00 00 00 00 00 00 00 00 00 00 00 00 00 00 00 00 00 00 00 00 00 00 00 00 00 00 00 00 00 00 00 00 00 00 00 00 00 00 00 00 00 00 00 00 00 00 00 00 00 00 00 00 00 00 00 00 00 00 00 00 00 00 00 00 00 00 00 00 00 00 00 00 00 00 00 00 00 00 00 00 00 00 00 00 00 00 00 00 00 00 00 00 00 00 00 00 00 00 00 00 00 00 00 00 00 00 00 00 00 00 00 00 00 00 00 00 00 00 00 00 00 00 00 00 00 00 00 00 00 00 00 00 00 00 00 00 00 00 00 00 00 00 00 00 Step 8: Save the changes done on a/2/1/3. The end result will look like this: This is a temporary fix as of now, the ideal fix would be to create a particle (.spa) specifically for the Fairy-type. The template is there to stay though. Part 6: Pokémon summary emergency freeze fix This is not a perfect fix, since what it does is that if it detects a Fairy-type icon that should be loaded, it will instead load the Normal-type icon. But at least when it comes to preventing a freeze when trying to view a Pokémon summary, it gets the job done. Step 1: Open overlay 207 with your Hex editor. Step 2: Change the following: 0×3C20 : 0698 AF21 0022 AF24 => 0049 0847 F13B0902 0×3C30 : 3118 AF20 8130 0858 => 0049 0847 033C0902 0×5EA8 : 051C 201C AF21 0022 => 0049 0847 273C0902 0×5EB8 : A800 3118 AF20 8130 => 0049 0847 393C0902 0×7888 : B000 2918 1320 0001 => 0049 0847 153C0902 Step 3: Save the changes done on overlay 207. Step 4: Open arm9.bin with an Hex editor. Step 5: Go to offset 0×8FBF0 and paste this for B2: 11 2D 00 DB 00 25 06 98 AF 21 00 22 AF 24 13 4F 38 47 11 2F 00 DB 00 27 31 18 AF 20 81 30 08 58 0F 49 08 47 11 2E 00 DB 00 26 B0 00 29 18 13 20 00 01 0C 4D 28 47 05 1C 11 2D 00 DB 00 25 20 1C AF 21 00 22 08 4C 20 47 11 2F 00 DB 00 27 A8 00 31 18 AF 20 81 30 08 58 04 49 08 47 A9 6B 1B 02 B9 6B 1B 02 11 A8 1B 02 31 8E 1B 02 43 8E 1B 02 or this for W2: 11 2D 00 DB 00 25 06 98 AF 21 00 22 AF 24 13 4F 38 47 11 2F 00 DB 00 27 31 18 AF 20 81 30 08 58 0F 49 08 47 11 2E 00 DB 00 26 B0 00 29 18 13 20 00 01 0C 4D 28 47 05 1C 11 2D 00 DB 00 25 20 1C AF 21 00 22 08 4C 20 47 11 2F 00 DB 00 27 A8 00 31 18 AF 20 81 30 08 58 04 49 08 47 E9 6B 1B 02 F9 6B 1B 02 51 A8 1B 02 71 8E 1B 02 83 8E 1B 02 Step 6: Save the changes done on arm9.bin. Part 7: Reinsertion Reinserting files will require you to first right-click and then: use Compression if you're reinserting overlays or arm9; use Import if you're reinserting anything else. Step 1: Open your Pokémon Black 2 or White 2 ROM with CrystalTile2. Step 2: Click the NDS icon (or alternatively click Ctrl+N). Step 3: Reinsert overlay 168 with the Compression option. Step 4: Extract overlay 168 but this time exceptionally with Export, you'll see why later. Step 5: Go to offset 0×363F40 and change 00 3C 1B 00 into 00 3D 1B 00, this will change the ROM (not RAM) address of overlay 168. Go to offset 0×364530 and change 00 9A E5 08 into 00 99 E5 08, this will change the ROM address of narc a/0/1/1. Step 6: Right-click on overlay9_167.bin and click 'distribution Overlay file location and space'. Step 7: Change 021998C0 into 02199740 (B2) / 02199780 (W2) and click OK. Step 8: Right-click on each of the following files and click Compression. arm9.bin overlay9_0167.bin overlay9_0207.bin overlay9_0265.bin Likewise, right-click on each of the following files and click Import. overlay9_0168.bin (this time only) a/0/1/1 a/0/8/2 a/1/2/5 a/2/1/3 Note: If you omit Steps 3 and 4 and try to reinsert overlay 168 using Compression AFTER the fat.bin has been changed, then CrystalTile2 will crash for some reason. Otherwise using Compression on overlay 168 is fine. Urgent to do: Try to load Hall of Fame Fairy-particle with a custom file, and try to get the Hall of Fame working on a real NDS. To do: Try to load the Fairy-type icon in the Pokémon summary (While I did build a workaround so that it doesn't freeze anymore on a NDS, the Fairy-type icon still cannot be loaded without throwing an error). Load the Fairy-type icon in the PC, while deactivating it if the Pokémon is not Fairy-type. Try to load the Fairy-type icon in the Pokédex. Make Struggle type 0×12, as it stands right now Struggle is considered Fairy-type. Hope you enjoyed reading. A little video to see the Fairy-type in action: [video=youtube;QE-HvGAAJnA]
-
 Hey everyone! I've been trying for weeks to get Pokemon Black 2 / White 2 to look 2D thanks to camera cheats but this seems worthless. Here is the cheat : By hacking the game's maps in SDSME and exporting the models of the maps or buildings to Blender, I discovered the orthogonal perspective which shows a a perfect 2D view (as in HGSS because the 2D view is possible in those games thanks to AR cheats). The only problem in Blender is that the models look blurry and it's impossible to obtain a perfect size of the models without the blurring. That's what I mean : So I wanted to know if someone is willing to try to look into the roms and deactivate the current perspective to make the game look 2D. As a graphist and as a game creator (I'm the creator of the fangames Pokemon Cinder & Foam), I'm really interested by the graphic style of the games and it will be a really good opportunity to study the game's graphics.
-
General Is PKHeX available for the Macintosh OS or Linux? No. You can use virtualization software like Parallels or VMWare to run a Windows OS virtual machine. My Pokémon won't work on WiFi battles or can't be traded. Why? This is usually a Pokémon legality issue. These problems aren't dealt with in the PKHeX subforum; see the announcement regarding cheating online. What is the Mystery Gift "Received List"? Every Gift has a unique ID associated with it. When you receive a Mystery Gift the game flags your save file as having obtained the gift, and doesn't allow it to be obtained again. PKHeX will set the used IDs for you; an ID can be deleted by right clicking the ID and choosing to "Delete". Can PKHeX create backups automatically? Yes, create a "bak" folder in the same location as the executable, and PKHeX will export a backup of every new save you load. Generations 7, 6 Is PKHeX compatible with Powersaves or Sky3DS? No. It never will be. Save files must be decrypted in order to load & save, and must be resigned before put back into your cart data. Generations 5, 4, 3 I'm using a flash card (R4, Acekard, etc) or emulator and my save file isn't able to be loaded. What's going wrong? Make sure the save data is in 4 megabit format (512KB) for Gen4/5 games, and 128KB flash for Gen3 games. Generations 2, 1 Does PKHeX support these games? Yes! Be sure you are exporting your save file in the "Battery" format (raw save file, not emulator specific).
-
 Hello everyone! I just uploaded some Pokemon DS rom hacking tutorial vids and wanted to post them here in case they help anyone out. They are definitely not high level stuff, mostly a showcase of how to use tools like Tinke, Kiwi, PokeDS/Pis, DS Text Editor, and PPRE for trainer editing. So more of a "rom hacking for dummies" kind of guide. Topics Discussed: Intro: Things to Know Before You Begin Pt 1: Overworld Sprites (including the elusive HM summon sprite) Pt 2: Trainer Front/Back sprites and VS faces before a gym battle Pt 2.5: Easier Editing w/ RECN Files (Aka: NCER) Pt 3: Pokemon Sprites Pt 3.5: Advance Pokemon Edits Pt 3.75: Gen IV Sprite Editor Pt 4: Text Editing w/ DSPRE Pt 5: Opening, Intro, Ending locations Pt 6: Trainer Editing w/ DSPRE Pt 7: Pokemon Icons Pt 7.5: Pokemon Icon Pallets Pt 8: How to use Photoshop and Graphic Gale Pt 9: Diamond/Pearl Battle Sprites Pt 10: Trainer Cards (Both Gen 4 and 5) Pt 11: HG SS Pokemon Follow Overworld Sprites Pt 12: 3D BMD0 Overworld Cutscene Trainer Sprites Pt 13: Pokemon Cries to Pretty Much Anything Pt 14: Quick Color Changes with Console Tool Pt 15: Wild Pokemon Editing w/ Advance DSPRE Tips Map Editing series: Pt 1: Make Your First Map with PDSMS Pt 1.5: Making maps with PDSMS 2.2 Pt 2: How to Import Custom Maps Pt 2.5: Reshaping a World (Matrix Editing) Pt 3: Adding Buildings to Maps with PDSMS Pt 4: How to Make Warps Scripting series: Pt 1: Walking you through my first script! Pt 1.5: Updating My Example Script for Any DSPRE Version If you have any questions, leaving a youtube comment would be a much faster way to reach me.
 -
tutorial Change Main Character Graphics
Lamphrey posted a topic in ROM - NDS Guides and Other Resources
Don't you worry guy, I got you! I actually wanted to do the exact same thing as you, switch out all the Main character graphics with my own, except I was aiming to change the Female MC ones lol. So anyway, there is a horrible lack of tutorials on the web/youtube about editing character graphics (except sprites, seems everyone knows how to do sprites). So I started digging around the rom using Tinke, and eventually I found a reasonably easy way to get my own sprites in to replace the originals. This guide I wrote was originally like 2 paragraphs and served just to remind me in case I forgot parts of my process, but after seeing your post I decided to turn it into a full-fledged Tutorial on Trainer Graphics Editing and Swapping. It's probably still a little rough in some places, and it is sort of long, but that's only because I tried to be super super detailed on how to do everything, and documented each step and exactly how to do it. Seriously, I wrote it to be overly clarifying haha. But at least you'll never get lost between steps. Here it is (oh and I guess I can post it in a Notepad format as an attachment for easy download too): Tutorial on all Trainer Graphics Editing and Swapping (For Pokemon HeartGold and Soulsilver, but you could probably use the same process of export and import for other games) ______________________________________________________________________________ SUMMARY: This tutorial will be on editing trainer Mugshots (Mugshots are the pictures of trainer faces that pop up when you battle a character that is important enough to have his own face. It shows up right before the battle actually starts, like "VS Silver" and then it has his face.) However, the way you edit Mugshots, TrainerBacks, Trainer Battlesprites, and other trainer images are almost all completely the same. So once you finish this tutorial on editing Mugshots, you'll have a very good idea of how to edit any other trainer images. __________________________________________________________________________________ TOOLS: 1. Tinke -is your number one tool. Not only can it be used to explore the files of the rom and look at the graphics, it can export the graphics and import graphics as well, allowing you to swap graphics. 2. Console Tools -If we need to mess with a palette, this is the program is the easiest way to do so. 3. Whatever art program you use, like paint or such. Note: I would HIGHLY recommend picking a program that allows you to use Layers, as it will make editing much much easier. Personally I swear by Paint.net. Also, always save your pixel-related images as PNG. Seriously, if you save them as .jpg, it will actually blur your pixels and blend the colors together and ultimately ruin your image. It's not that noticeable with large images with lots of colors like photos, but with pixel art it is very destructive. 4. A copy of your game in ROM format. Please make sure you support Nintendo and GameFreak by buying and owning the actual game before you decide to start have fun with the ROM. _________________________________________________________ PHASE 1: -Copy and paste your rom to some other folder to make a back up. Just in case. -Make a folder called 'Mugshots' or something, so you can hold all your mugshot-related files in one place. -Download and open latest version of Tinke. -Open your Rom (the game you use) and then navigate to where the Mugshots are stored. -The folder system in Tinke works just like your computer's folder system. -The directory where Mugshots are stored is (a/1/0/9). ****NOTE: I ended up finding every directory for all the player-related graphics in the game. I will include all the directory locations at the very end of this tutorial. However for now I would recommend you stick to editing just the mugshot for this tutorial. -To to get there, you click the plus to expand each folder. -So click the plus beside the folder labeled 'a'. It will expand to show you more folders inside it. So click the plus next to folder '1', then '0', then you will find folder '9', which you cannot expand. That's where the Mugshot Graphics are. -Click folder '9' then click 'unpack'. -You will see a bunch of new files appear. These are all the Mugshots pictures used in the game. -Now go to the trainer you want to change. For this tutorial I will edit the mugshot of the trainer Silver (the jerky redheaded rival you name who fights you throughout the game) -All the files relating to Silver's Mugshot, are '9_127', '9_128', '9_129', and '9_130'. -However, only the first 2 of those files need editing. -We will be dealing the first file, the .RLCN (the colors aka a palette file), and the second file, the .RGCN (this is the actual picture) -The .RLCN file is just a palette. It contains the 16 colors used by the picture. (Silver's is 9_127.RLCN) -The .RGCN file is the picture. But Tinke won't even let you look at it with first viewing a palette file. (Silver's is 9_128.RGCN) -Alright, let's take a peek at these files! -Select the palette file (remember that's the .RLCN file), and click 'view' to see it. See the color collection? Every color used in the picture is shown here. Notice the very first color in the row. Whatever color is placed first in the palette is marked as a Transparency. This means that color in the picture will be invisible in the game. (That's why game characters don't have colored boxes around them when you play the game. It becomes invisible) -Now click on the .RGCN file right below it. (Silver's is 9_128.RGCN) ***Note, if you want to view ANY .RGCN picture, you always have to click 'view' on a .RLCN palette file first. You can't look at .RGCN pictures without first looking at a palette. -See, that's the character's mugshot. But it's scrambled. -However, there is a file right below it that will put it together the way you'd see it in the game. -So click the next file, an '.RECN' file. All this file does is assemble the scrambled picture. It just puts it together like a puzzle, and makes the background invisible. That's it. -Now click the next file after that. It's the last file for Silver. It's a '.RNAN' file. It does the same exact thing as the RECN file, but it leaves the background in. I actually prefer this one because when you edit it you can easily see where the picture's boundaries are. -So Silver's is 9_129.RNAN and click 'View' -See? It put it together for us, isn't that nice? (The natural, scrambled, raw form of the Mugshot is 256 x 24. The game naturally reassembles the picture into the actual picture we can see and understand of 96 x 64.) -And now we know what all the files are. Good! Time to export and edit them! ___________________________________________________________________ -So, if we're going to make our own trainer mugshots, we need to start with a picture that has the right dimensions. -Let's pick a trainer mugshot. You can either alter it, change the colors, or just erase their picture and draw over it with your own graphics. -Whatever you want, it's a good place to start, so let's export it to our computer. - We are actually going to export all 3 files (the pallete, the scrambled mugshot, and the unscrambled mugshot) Directions on how to Export each file to your computer will be below: -1. Click the palette file you want (.RLCN), Click 'View', click Export and save it someplace you'll remember. -2. Click the Scrambled Mugshot file you want (.RGCN), Click 'View', click Export and save it someplace you'll remember. -3. Click the Unscrambled Mugshot file you want (.RNAN), Click 'View', click Export and save it someplace you'll remember. __________________________________________________________________________ PHASE 2 -So, you can use the exported .RNAN picture as a guide to draw your mugshot. Remember to keep it within the dimensions of the picture. (96 x 64) ****Count every single color used in your picture, including the background. You CANNOT use more than 16 colors. *****The background color will end up being invisible in the game, and so make you you don't use the background color for anything else, or it too will be made invisible. -Finished your Mugshot? Completely done? If so, now we need to give it a palette. -In Tinke, Click the palette file (.RLCN) we were looking at earlier and click 'view'. It's showing us the colors again. -Click 'Import' and select the Mugshot you just drew. -It will take all the colors from your picture and put them into a palette -Click 'view' again to refresh, and there will be the colors you used in your picture! -Now, look at the first color box. Is it the color of your background? If so, this is good, and the background color will now become invisible ingame, and you can skip down to PHASE 3. If not, we need to do some extra steps to fix that and so continue on right below: -Click 'Export' to save your new palette. -Download and open the program called "Console Tools". Use it to open the new palette file (.RLCN) you just exported. -Click on each color and look at the sliders in the bottom right corner to check that the numbers for R, G, and B match exactly with your new mugshot's pictures. (they most likely will, and this is just double checking) -Make sure the color of the Background is the very first color. This is because the first color of the palette is made invisible ingame. ***Note to make it easier to reorder the color, you can click and drag the color of the background square to the front of the row. Cool. -Click File, Export it. This is the final palette you will use. -Back in Tinke, go to your palette file and click 'view' and then 'import', select your newest palette file. Click 'view' again to refresh, and there we go. We have our palette file. __________________________________________________________________ PHASE 3 -Now we need to import your Trainer mugshot in, but first we need to scramble it. See how chopped up the .RGCN picture is? The game wants it in that format. So we need to put it in that format. -Go to that exported .RGCN file (it's the long, scrambled picture) we exported. (it will be a png file now after exporting it) -Open it in your image editing software, like paint or whatever you use. ---Some things to know about this picture: >This scrambled Mugshot is 256 x 24. >It is made up segments. These segments are like puzzle pieces of the picture. >There are 3 rows of segments, 4 segments in the top row, 4 segments in the middle row, and 8 segments in the bottom row. >Each segment in the first two rows is 64 x 8. >Each segment in the last row is 32 x 8 -So just use this image as a Guide and start placing the pieces of your mugshot over it, like assembling a puzzle. -When you're finished, export this as a png. Also check that the dimensions are right. The image should be 256 x 24. -Alright, so now it is in the proper format and we can import it back into Tinke Let's check to make sure we scrambled it correctly. ______________________________________________________________________ PHASE 4 -In Tinke, go to the .RGCN file you want to replace with your own scrambled mugshot. Click 'View'. -Now, at the bottom right corner there will be 3 options, the bottom one says 'Replace palette' -MAKE SURE YOU CHECK the "Replace palette" before importing or you may end up getting major graphical transparency issues. -Click 'import', and select your scrambled mugshot. -So there is our scrambled mugshot! Let's check to make sure we scrambled it right. -Go to the file directly below this file, the .RNAN file. Select it and click 'View' Bam, it has assembled the picture to what we will see in the game. If it looks out of order, you've made a mistake when scrambling it! You'll have to try PHASE 3 again, and scramble it all over again. It's tedious, I know, but hang in there! Remember to use that scrambled mugshot we exported as a guide! -Almost done! Now, go to the directory, and look at the Folder 9 you unpacked earlier. -click the little minus square next to it. This will minimize all the pictures back into the folder. -Now click Folder 9 itself, and click 'pack'. -Now Click 'Save Rom' and you will have to save a whole new rom, this new rom will have your new graphics in it. I would save it in another folder but give it the exact same name as the rom you normally use, this way it can still use the same Save file. -Also, back up your save file, and your roms! I haven't had any problems with this so far, but it always pays to keep back ups just in case. ___________________________________________________________________________ And there we have it. You have changed the mugshots within the game. You will find that editing any other character graphics, such as battle sprites, battle backs, even the intro character graphics follow all the same steps we did here. It almost always needs a palette, and 16 colors, and needs it scrambled to whatever dimensions the .RGCN file shows. That's about it. It's really not difficult to change the graphics once you know where they are and how to export and import them. The only hard thing about this just scrambling the picture, and that's just really more tedious than it is challenging. _____________________________________________________________________ DIRECTORY/GRAPHICS LOCATIONS: So, here are the locations of other trainer graphics in-game: *****NOTE, because Trainer BattleBacks are kind of an animation, as in they have multiple frames, I beleive someone made a small program that will unscramble and scramble the images for you, which should make your life easier. Haven't tried it myself yet, but you can check it out here: https://gbatemp.net/threads/pokemon-platinum-heartgold-soulsilver-trainer-backsprite-editing.366353/ ****TIP#1: For .bin files, just select them and click unpack, then there will be a picture you can view. ****TIP#2: If you have issues certain graphics, remember that you usually have to view them in a specific order: First view the .RLCN file, then view the .RGCN file, then view the .RNAN/.RECN. ****TIP#3 Some Graphics have 2 .RGCN files (like trainer BattleBacks). Usually one of those .RGCN just appears as garbled nonsense, while the other one apears as normal. Ignore the garbled one. a/1/0/9 Mugshots -207-210 is Male MC. 211-214 is Female MC. Around 127 is silver. Around 115 is Sabrina. a/2/6/2 Intro Player Face 2_53 is palette, (2_54 both MaleMC and FemaleMC) (2_57 MaleMC) (2_58 FemaleMC) a/2/6/2 Intro Player Fullbody 2_73 to 2_74 (Both Male and Female MC) a/2/6/2 Intro Player Hand 2_81 to 2_83 (Both Male and Female Hands) a/1/2/0 Gender Select Fullbody --male 0_13, 0_17 to 0_21 AND 26-29 female siloutte a/0/4/9 Trainercard Player Sprite ---9_44 female and male sprite a/0/5/8 Trainer Battle Front Sprites ***(Note: the palette files for these seem to come after the .RGCN files, instead of before.) Male MC is 8_1 and 8_0. FemaleMC is 8_6 and 8_5. Silver is at 8_596 - 8_592 AND 8_112 ?? I don't know why he repeats. Best to change both graphics though, I suppose. a/0/0/6 Trainer Backs (throw the pokeball) (Male MC 6_1 and 6_0) (Female MC 6_6 and 6_5) ALSO, there are MC graphics at the end, like second to last set of files. END Hope this helps somebody! Now, if I missed anything, or there's an easier way you know of, let me know! (especially if there's some program for scrambling and de-scrambling ugggh) Maybe in the future I'll do this as a video tutorial. Happy Swapping! -
 So alot of people have been asking how I do animation swaps and stuff in my hacks, so I decided to post a tutorial. You will need: pk3DS (Latest Version) Ohana3DSRebirth (mariosonicds build) Step 1: Uncompress a/1/7/0 in pk3DS Step 2: Find the bin that contains the model that you want to use Step 3. Uncompress the bin in pk3DS, You should get a folder named ID_CM (ID being whatever number the file is) Step 4. Inside that folder you should see 9 bin files, copy the file named 0.bin Step 5. Find the bin the contains the animations you want to use, and uncompress it Step 6: You should get another folder named ID_CM that also has 9 bin files in it, overwrite the 0.bin in that folder with the one you copied Step 7: Pack the folder, you should now have a file named ID.CM Step 8. Rename the file to ID.BIN and replace the existing file Step 9. Repack the GARC Now you should have different animation ;). If you have any questions let me know!