Search the Community
Showing results for tags 'high sierra'.
-
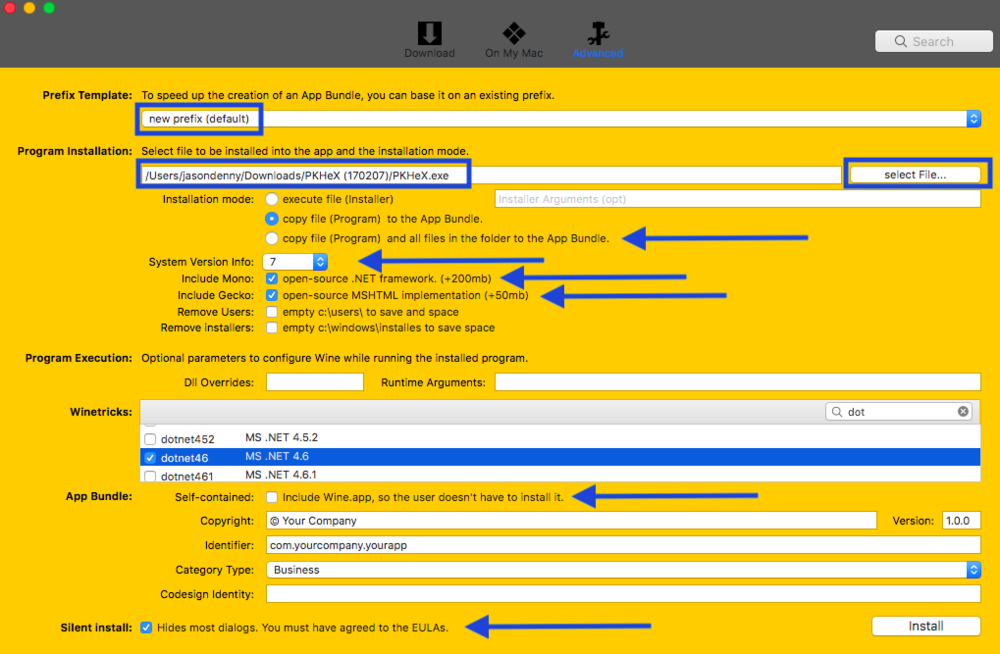
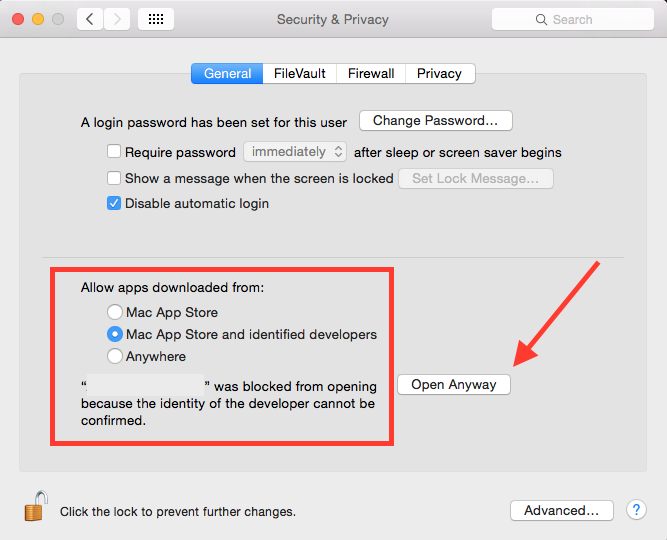
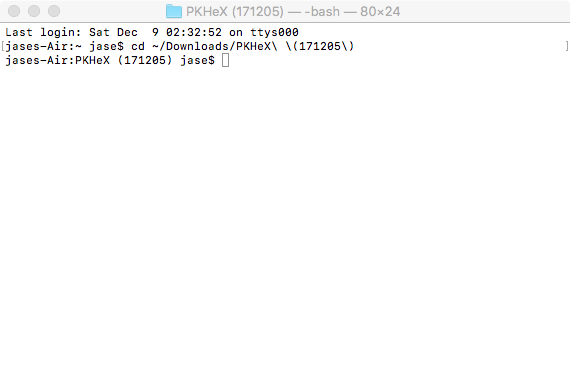
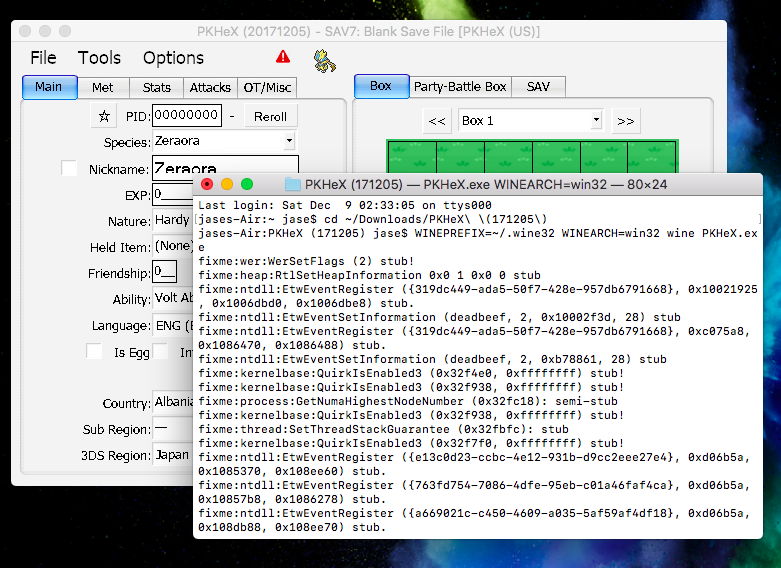
PKHeX on Mac A User Friendly Guide for WINE Intro This guide will hopefully clarify a few things regarding WINE and PKHeX running on MacOS as well as help anyone start from scratch with WINE [in order to run PKHeX]. WINE is a fickle thing; it's not guaranteed to work (at all) but the success rate these days is impressive! So, don't get discouraged if things do not work the first time around. Nothing we do in this guide is permanent, although I encourage you to make a Time Machine backup of your system or at least backup your important data. With that being said, I have been using WINE for quite some time. Regarding PKHeX, It's going on almost a year and I have yet to experience any depressive issues using WINE to run it. I have done several clean installs of macOS Sierra and macOS High Sierra in order to give you the most accurate information possible. If I have missed something or you know any tips or tricks, I would appreciate the feedback! Also, you'll find only the bare minimum information in this guide of what you will need to get PKHeX up and running. I say this because without any theming, the app will look like an old school Windows program. NOTE: Aesthetics may not be the most important thing to consider (especially if you're in a hurry or maybe don't care) however there are some dependencies (winetricks) that are absolutely necessary for some programs to run. Fortunately PKHeX isn't too picky. Choices Download the PKHeX app in the PKHeX for Mac thread Use Winebottler to make a PKHeX.app for yourself Use Wineskin Winery to make a PKHeX.app for yourself (no support here) Use WINE to run the PKHeX executable via Terminal Use a Virtual Machine (VM) or something along those lines (no support here) Winebottler Pretty straight forward process. Tick all of the items with arrows next to them, like in the screenshot below. Also necessary winetricks for PKHeX: dotnet461; corefonts; cjkfonts; tahoma. May need to change security preferences to run the app: NOTE: Winebottler is the fastest, easiest "DIY" option for a beginner. (Some argue that Wineskin Winery is the fastest and most easy way to whip up an app. I'll say it just depends on your skill level, though I agree.) Another thing, apps may be less stable than if they were launched using other methods basically because of the lack of options Winebottler has to fine tune things (e.g.; adding a string in the Registry Editor to enable Retina compatibility.) Install WINE on your Mac [Run PKHeX Using Terminal] Installing WINE on your system using Homebrew is the most noob-friendly way [to install WINE on Mac] that I have found, so let us just use that. To start, I'll tell you that you will be installing 4-5 minuscule things on your Mac; Xcode CLT, Homebrew Package Manager, XQuartz, WINE, and some Winetricks depending on the executable your are attempting to run. In this instance, our target is PKHeX. So onto the first thing, Homebrew. Before you can use "brew commands" in Terminal, you must have Xcode Command Line Tools installed. If you already have Xcode installed on your Mac, you should be peachy. If not, no problem! Open Terminal to get started! Xcode CLT: xcode-select --install If you're asked to agree to Xcode's ToS, next type: sudo xcodebuild -license Homebrew Package Manager: /usr/bin/ruby -e "$(curl -fsSL https://raw.githubusercontent.com/Homebrew/install/master/install)" When that finishes up, you'll want to make sure everything is in order: brew doctor For future reference, you can update Homebrew using: brew upgrade XQuartz: brew cask install xquartz WINE: brew install wine brew upgrade wine # For future reference That will create a 64-bit WINEPREFIX which will be located at: ~/.wine NOTE: If you would rather use the developer version of WINE, use these instead: brew install wine --devel brew upgrade wine --devel # For future reference Winetricks: brew install cabextract brew install winetricks brew upgrade winetricks # For future reference NOTE: You DO NOT need to install every winetrick available, just the ones your programs depend on to function. For PKHeX, you will need to install these; dotnet461, corefonts, cjkfonts, and tahoma (why not). Install the "tricks": winetricks "trick" # (e.g.; winetricks dontnet461) Complete list of Winetricks For some, the winetricks process will be easier with a GUI. I suggest installing Zenity if you want one: brew install zenity # After installation finishes, you will have a neat GUI for winetricks. Use: winetricks --gui Attention Okay, this is important, so listen up. It's a known issue that .NET Framework 4.5 and up, (dotnet45 and up) does not install properly on a 64-bit WINEPREFIX, which was installed by default earlier (brew install wine). That is okay because a 64-bit WINEPREFIX may come in handy in the future. To get around this issue, you will create a 32-bit WINEPREFIX. Creating the 32-bit prefix: WINEPREFIX=~/.wine32 WINEARCH=win32 wine wineboot You will now have a 32-bit prefix located at: ~/.wine32 Next, install the aforementioned winetricks in your new prefix. It is important that you use these next commands any time you want to run or install ANYTHING inside of that 32-bit WINEPREFIX. Remember, we need at least .NET Framework 4.6 to run PKHeX and we must install .NET Framework 4.6 in the 32-bit prefix, therefore we will be running PKHeX from inside of the 32-bit prefix. (I know, don't ask, lol) WINEPREFIX=~/.wine32 WINEARCH=win32 wine "Program.exe" WINEPREFIX=~/.wine32 WINEARCH=win32 winetricks "trick" Senario: You have done all of the above and you're ready to run "PKHeX.exe". Download PKHeX and remember its location. It's usually in the Downloads folder. Open Terminal and change directories to the PKHeX (version) folder. For example: cd ~/Downloads/PKHeX\ \(171205\) Then, run the executable: WINEPREFIX=~/.wine32 WINEARCH=win32 wine PKHeX.exe


