

If you've spent any amount of time in the modding community, you have probably heard of people hacking Pokémon games. Usually it's romhacks that you hear about, but you've also probably seen another form of it: custom Virtual Console frames. You know, that cool frame that appears when you launch a Virtual Console title while holding start or select. People have been doing this since the Super Gameboy days on the SNES, and Virtual Console is no different. People like to make their stuff look good and to their liking.
There are tons of tutorials out there for making your own CIA's out of roms of games you own. There's even tutorials out there on how to package your own custom frame into your personalized/hacked CIA, with applications that do the heavy lifting for you. But what if you wanted to use your own custom frame with an official Virtual Console title? Well...there aren't any tutorials for that; at least, not that I could find. So that's why I'm here: to fill that niche and save people the difficulty I went through.
What you need:
- An official Virtual Console title (we'll be using Pokémon Crystal in this tutorial).
-
An official 3DS console, soft modded with Luma, following the guide at https://3ds.hacks.guide/
-
Following the linked guide will also provide you with the following, all of which are needed:
- FBI (for installing CIAs).
- godmode9 (for file manipulation).
- layeredFS (for file replacement).
-
Following the linked guide will also provide you with the following, all of which are needed:
-
The most up to date version of New Super Ultimate Injector, found here: New Super Ultimate Injector
- At the time of writing, the newest version is beta 28.
- You may need to change the language of the application the first time you launch it. To do this, go to tools (3rd option from the left at the top of the window), then Options (last item). Then in the first drop down, select your language.
Warnings:
- Following and/or deviating from the steps in this tutorial is done at your own risk. There is always the chance for mistakes or bricking to happen, so back up your stuff just in case. Neither I nor Project Pokémon is responsible or liable for any damage done to your property as a result of following this guide.
-
Do not attempt to follow this tutorial with stolen, torrented, or otherwise pirated roms. Pirating is illegal, and we strongly recommend you purchase the Virtual Console title you wish to follow this guide with. You wouldn't download a Pikachu, would you?

- Always use the most up to date software. Failing to do so increases the likelihood of bad things happening.
Part 1: Getting your Title ID
In this part, we will be getting your Title ID.
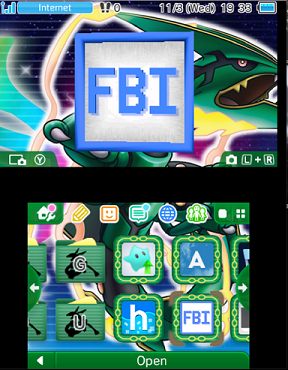
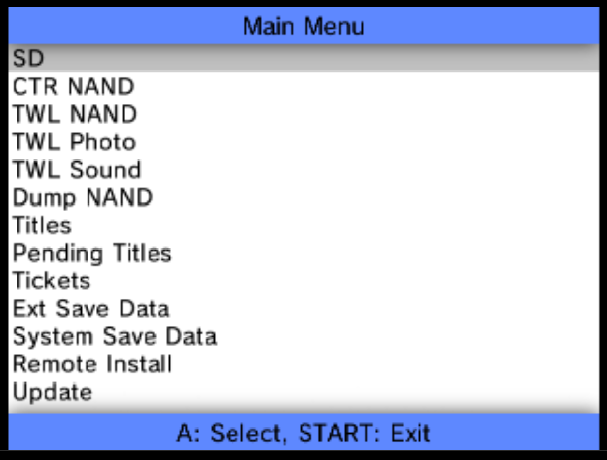
1. Boot your 3DS, and then Launch FBI.
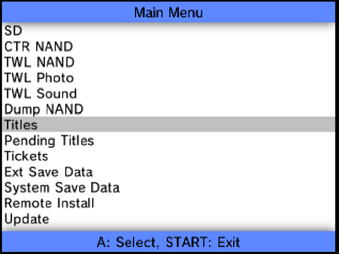
2. Once FBI loads, navigate down to "Titles", and press A.
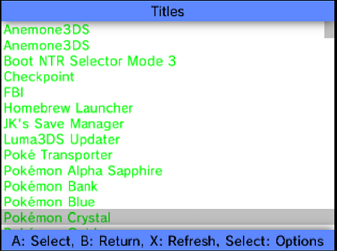
3. Navigate to the installed Virtual Console (VC) title you will be working with. For me, it will be Pokémon Crystal.
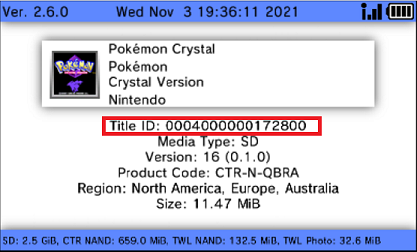
4. Get a pen and paper, and write down the Title ID. Don't lose this, you will need this later on in this tutorial.
5. Press B to return to the previous menu.
6. Press start to exit FBI.
7. Turn off your 3DS.
Part 2: Dumping your rom
In this part, we will be dumping your rom from your official VC title app.
1. Starting with your 3DS turned off, hold Start, and then turn your 3DS on. This should start godmode9. Hold start until the godmode9 logo appears.
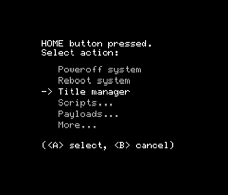
2. Press the Home button. This brings up the Home Menu.
3. Navigate down to "Title Manager" and press A.
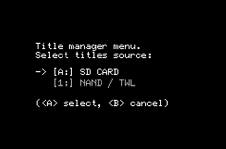
4. Select "[A:] SD Card" and press A.
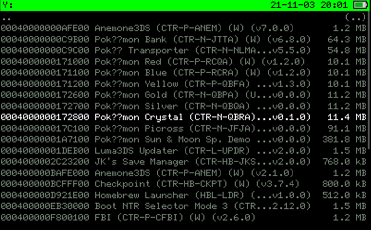
5. Let godmode9 load the full list, then navigate to the installed VC title you'll be working with and press A. For me, it's Pokémon Crystal.
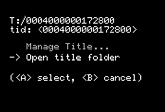
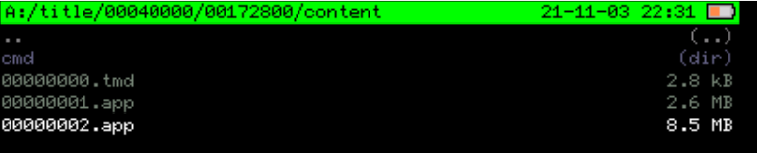
6. Navigate down to "Open title folder" and press A.
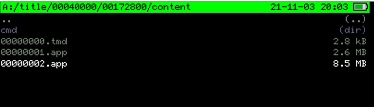
7. Look at the list, and identify the .app file that is the largest. Navigate to it, and press A. If you have a 2nd, smaller .app file, it is likely the game manual.
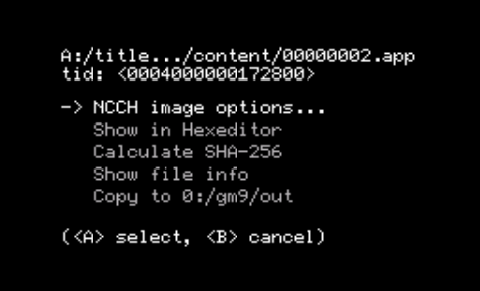
8. Navigate to "NCCH image options" and press A.
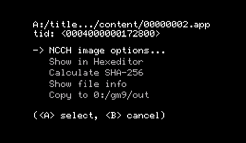
9. Select "Mount image to drive" and press A.
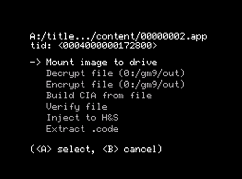
10. Press A again to confirm.
11. Navigate to "romfs" and press A. This is for non GBA games. Other systems may vary.

12. Select "rom" and press A. This is for Gameboy and Gameboy Color games. Other systems may vary.
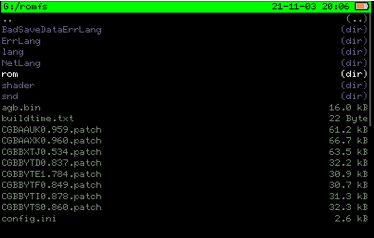
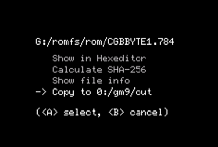
13. There should only be 1 file here; navigate to it and press A.
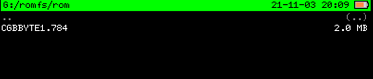
14. Navigate to "Copy to 0:/gm9/out" and press A.
15. Let godmode9 do it's thing. Once done, press A to continue.
16. Press B until you are at the godmode9 home screen.
17. Hold the R button, and press Start. This powers off the console while in godmode9.
18. Remove your SD card from your 3DS, and insert it into your computer.
19. Open your SD card on your computer, and navigate to gm9>out and move the file somewhere you will be able to keep track of it. Delete the file from gm9/out.

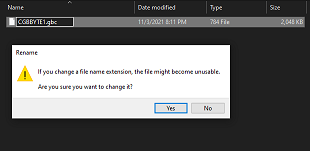
20. Change the file extension to .gbc for Gameboy Color, and .gb for Gameboy. Other extensions for other consoles may vary.
21. For non Gameboy and Gameboy Color titles, these instructions may vary; see the guide at GlazedHax for instructions your specific console.
Part 3: Creating and installing your CIA
In this part, we will be creating and installing your custom CIA, which will give us access to the file responsible for displaying the VC frame, with your custom frame already injected into it!
1. Launch New Super Ultimate Injector (NSUI) on your computer.
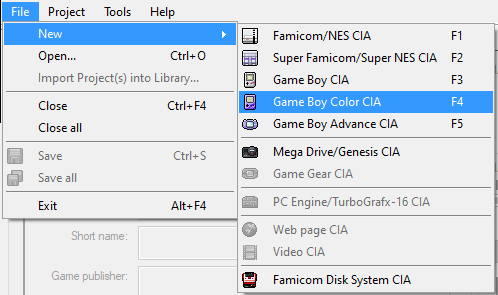
2. Click "File", then "New", then select your system. For this guide, we'll be selecting Gameboy Color. If you aren't working with a Gameboy Color title, your steps may vary, and you may need to refer to another resource on how to use NSUI to generate your CIA with your custom frame.
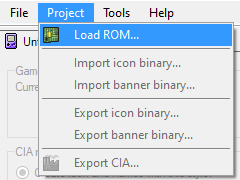
3. Click "Project", then Load ROM.
4. Navigate to where you stored your rom, and click Open. Let NSUI load the file and all of its information. Disregard the error that says "Cannot download image". It will come up multiple times, close all of the error messages.
5. Reference this graphic for the following steps:
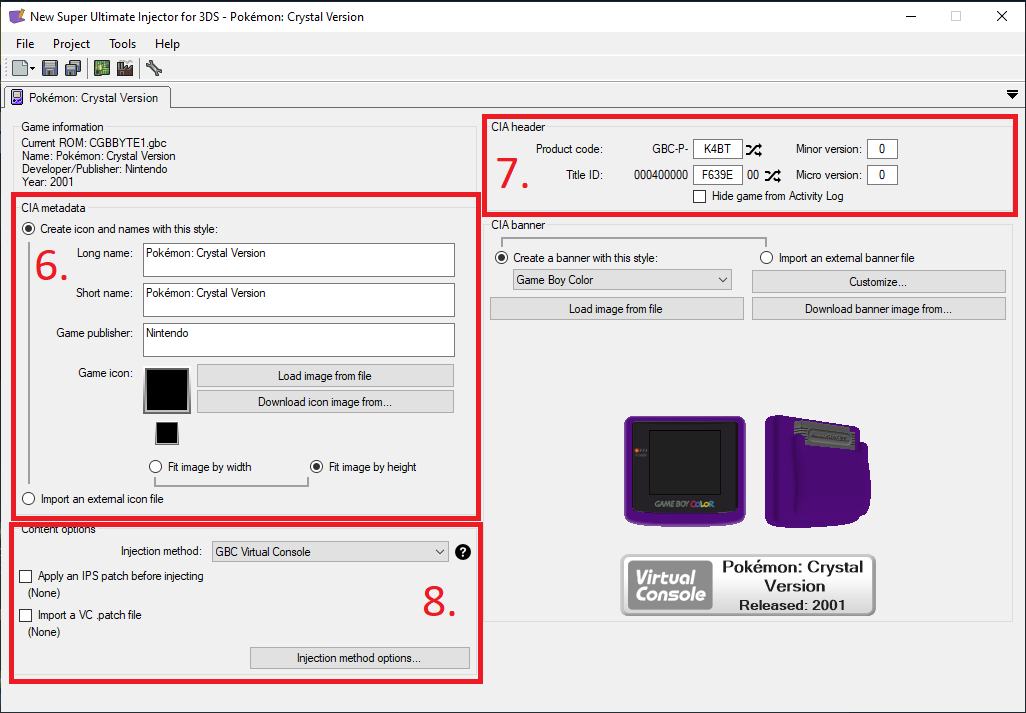
6. In "CIA Metadata", fill out the information that help you differentiate this from your official VC title. Long name is the name that will display on the Home Screen. Short name is the name that will display in areas where a full name might not fit, like the settings app. Set the game publisher to whomever it is. The "Game icon" is optional; you can load it from a file or you can attempt to access the database; I couldn't figure out how to get this to work. If I wanted to use a picture, I would just google a picture of the game's title screen and use that.
7. "CIA header" is really for if you wanted your CIA to look official; we will be deleting this app later, so this box isn't really necessary. Fill it out if you want.
8. "Edit Content Options" is where you will select your custom frame, as well as other options. It allows you to apply an IPS patch, as well as custom patches, also. Click "Injection method options" to open the options for selecting your custom frame.
9. Reference this graphic for the following steps:
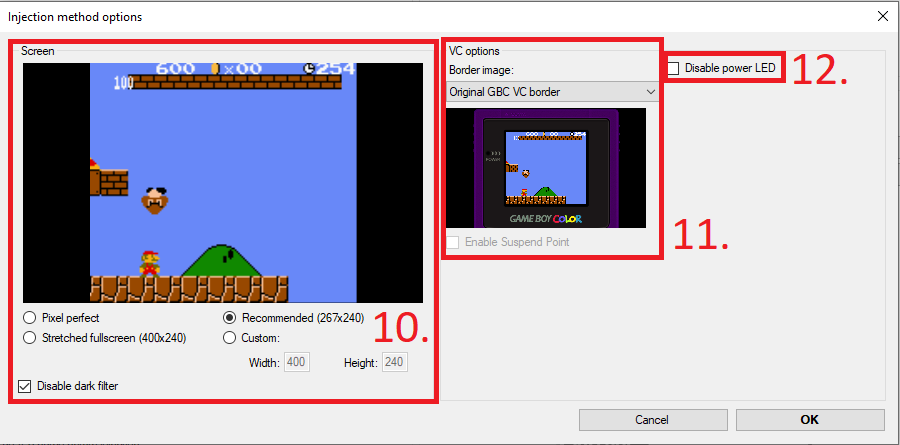
10. "Screen" is where you will choose how you want the screen to appear. You can leave these as is if you like, or you can change them to your liking.
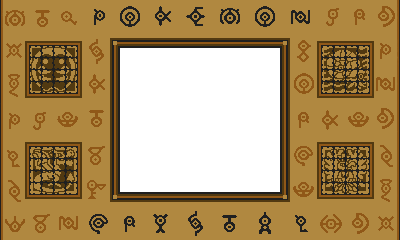
11. "Border Image" is where you will select your custom frame. Click the drop down, then select the bottom option, "custom image". Your image must be exactly 400 x 240 pixels. Here is mine, if you want to use it:
12. "Disable power LED" disables the battery indicator LED that would appear on the stock VC frame. If you don't disable this, and you don't include the LED in your custom image design, it will show through your custom frame.
13. Click ok when you're finished.
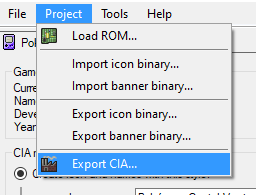
14. Click "Project", then "export CIA". Give it a name, then save it where you can find it.
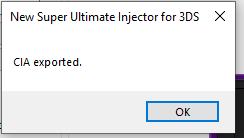
15. Once you have a confirmation window that says "CIA exported", click OK, then close NSUI. NSUI may ask you if you want to save your project; do so if you like. Saving your project is different than exporting it. NSUI uses its own file type for saving projects, I think. Its really only useful if you anticipate going back and changing your CIA settings and re-exporting it.
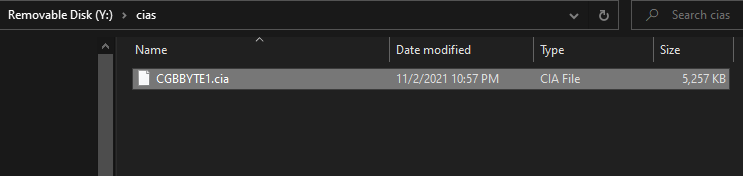
16. Copy your CIA, and paste it on your SD card in your "cias" folder. If you don't have one, create it, then paste the CIA there.
17. Remove your SD card from your computer, and reinsert it into your 3DS. Turn your 3DS on normally.
18. Launch FBI.
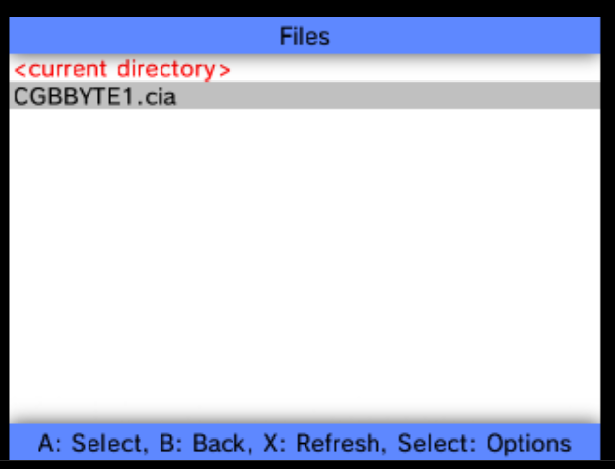
19. Navigate down to "SD" and press A.
20. Navigate to "cias", press A, then navigate to your CIA file, and press A.
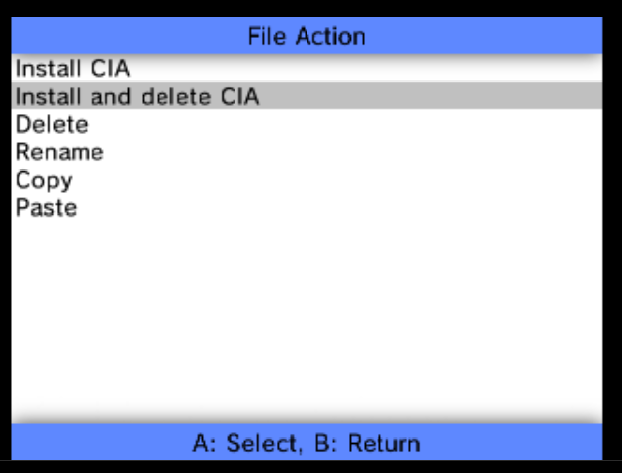
21. Select "Install CIA and delete CIA", and press A. This installs your CIA, then deletes the installation file from your SD Card. If you don't want to delete the file, then just select "Install CIA".
22. Press A again to confirm.
23. Allow FBI time to install your CIA. When finished, press any button to confirm.
24. Press B twice, then press Start to close FBI.
25. You should get a notification of new software. Unwrap it, then launch it while holding Start or Select to test your injection.
26. If everything went well, your custom frame should show up. After testing, close the app, then open FBI.
27. Similar to how you found your Title ID for your official VC title, you need the Title ID for your custom CIA that you just installed and tested. Follow the steps in part 1, except follow them for your custom CIA. Write this custom Title ID down and make sure you label it so you don't get it mixed up with your Title ID for your official VC app.
28. Exit FBI, and then turn off your 3DS.
Part 4: Dumping your romFS and obtaining your face_cgb.ttp file
In this part, we will be grabbing the file that will enable your new frame to run in the official VC title you are working with.
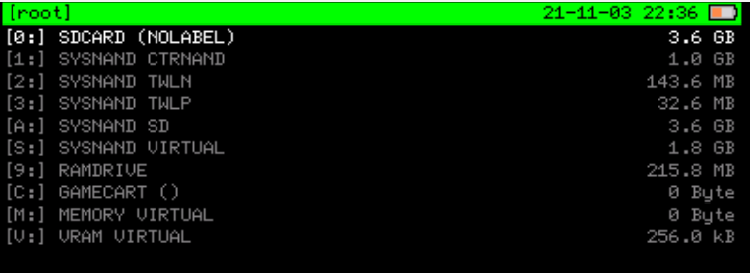
1. Starting with your 3DS turned off, hold Start, and then turn your 3DS on. This should start godmode9. Hold start until the godmode9 logo appears.
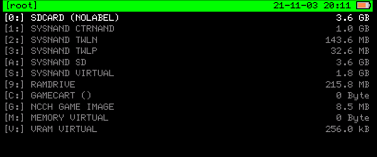
2. Navigate down to "SYSNAND SD" and press A.

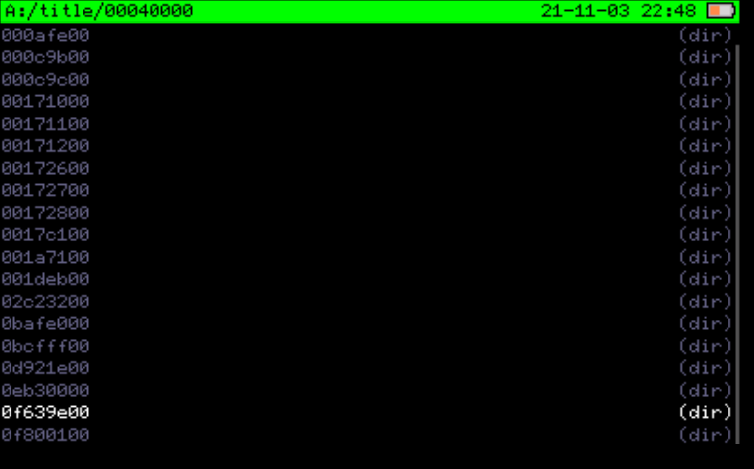
3. Navigate down to "title" and press A.

4. Select the item that matches the first 8 digits of your custom Title ID. In this case, mine is 00040000.

5. Navigate to the item that matches the last 8 digits of your custom Title ID. In this case, mine is 0F639E00.
6. Select "content" and press A.

7. Look at the list, and then navigate to the .app file that is the largest, and press A. If you have a 2nd .app file, it is likely the manual for that title.
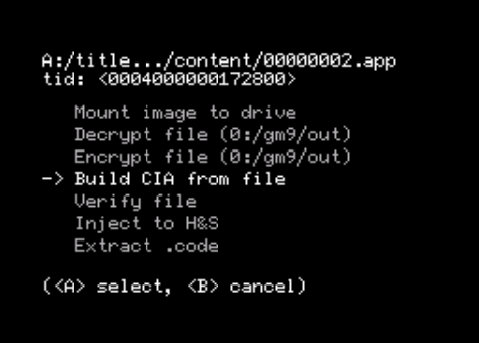
8. Navigate to "NCCH image options" and press A.
9. Select "Build CIA from file" and press A. This might take a bit, so be patient.
10. Once godmode9 is finished building the CIA file, press A to continue. Then press B until you are back at the home screen. Navigate to "SDCARD" and press A.
11. Navigate to gm9, then to out, then select your CIA file, and press A.

12. Select "CIA image options" and press A.
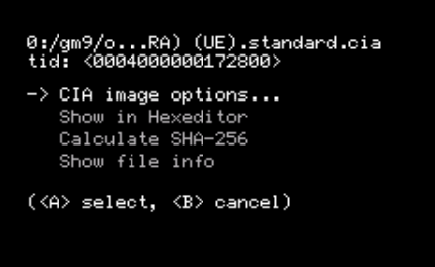
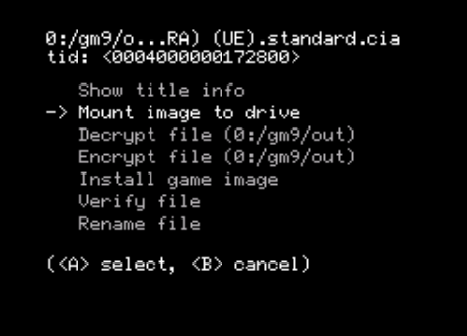
13. Navigate to "Mount Image to drive" and press A. Press A again to confirm.
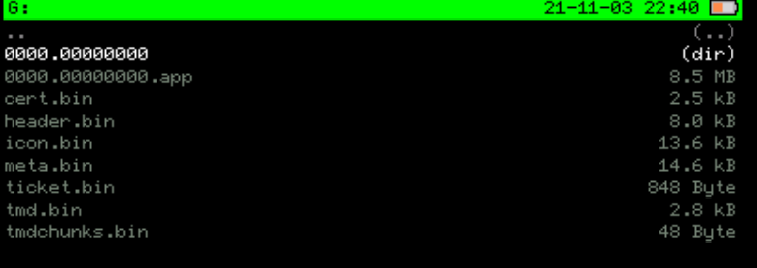
14. If you look at the right column, you should only see one "dir". This is a directory; select it, and press A.
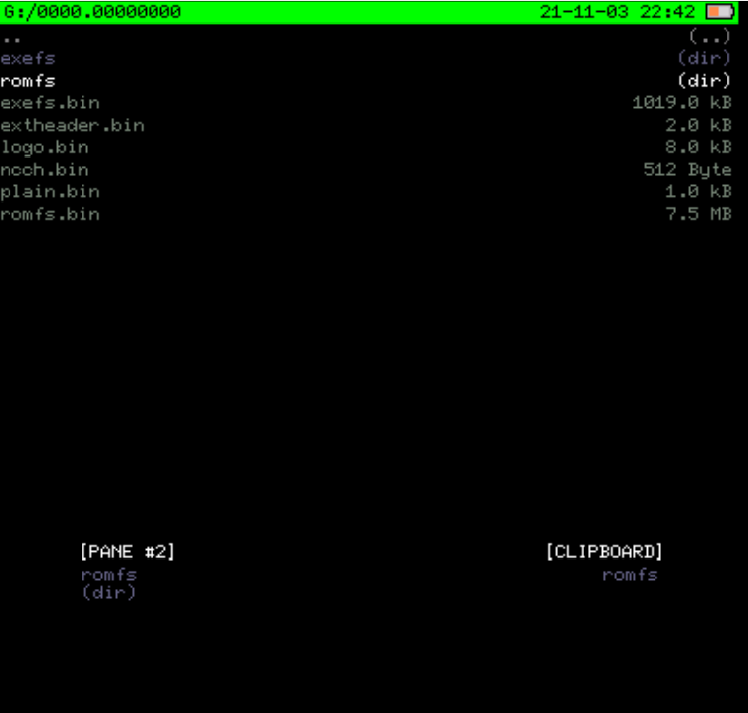
15. Navigate to "romfs", and press the L button. This selects "romfs". Then press Y. This copies "romfs". You should see "romfs" on the clip board in the upper right corner of the lower screen.
16. Press B until you are back at the home screen, then navigate again to SDCARD/gm9/out.
17. Press Y. This pastes "romfs" in the current directory. Press A to confirm, then wait for godmode9 to finish.

18. Hold R and then push start to shut down your 3DS.
19. Remove your SD card, then insert it into your computer.
Part 5: Injecting your custom face_cgb.ttp
1. Open your SD card on your computer,
2. Navigate to gm9/out/romfs, and look at the files. You should see a file called "face_cgb.ttp". Select it, and copy it somewhere you can find it. Navigate back to gm9/out, and then delete the contents of the folder, if you like.
3. Navigate back to your SD card, and select "Luma", then "titles". If you don't have a "titles" folder, create one and then open it.
4. In the "titles" folder, create another folder, and name it your Title ID for your official VC title, and make sure to include all 16 digits.
5. In this folder, create a folder named "romfs", and then open it.
6. Copy your "face_cgb.ttp" file into this folder. Then close out of your SD card, remove it from your computer, and reinsert it back into your 3DS.
7. Hold select, then turn on your 3DS. This boots into the Luma menu.
8. Navigate to "Enable game patching" (2nd on the list), and press A if it doesn't already have an x to the left of it. This will allow layeredFS to run your face_cgb.ttp file, instead of the one that comes stock in your official VC app.
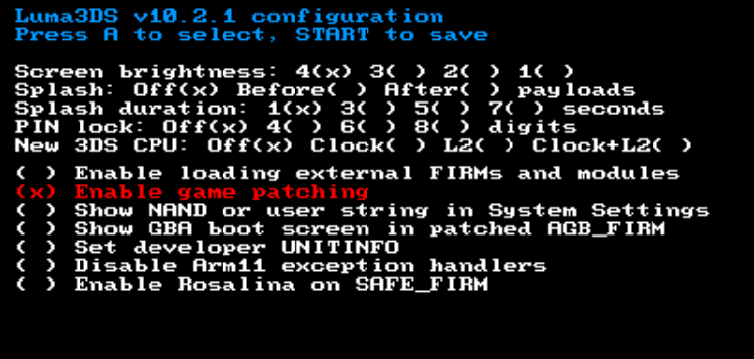
9. Press start to save. This will reboot your 3DS.
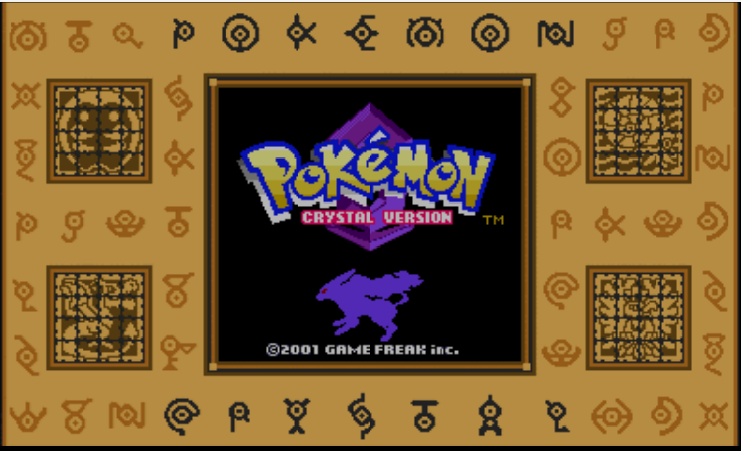
10. Hold start or select, and then navigate to your official VC title, and launch it.
11. If everything worked properly, then your new frame should be visible while the VC title plays in the middle! Congratulations!
12. IMPORTANT: you must leave your "face_cgb.ttp" file where it is for as long as you want to use your custom frame. Removing it will return your VC frame back to stock. To change your frame, you must generate a new "face_cgb.ttp" file using this tutorial again (from the start), then switch out your "face_cgb.ttp" files. Alternatively, you can use this guide over again to create a new "face_cgb.ttp" file for a different game.
Part 6: Clean up
- Using the settings app on your 3DS, uninstall the app you installed in part 3. Make sure to select the right one, and don't uninstall your official VC title.
- If you haven't been already, grab all of the files you generated while following this guide, and put them in folders and label the folders so you can remind yourself of what you did if you ever have to go back and redo it.
- Feel free to clean out your gm9/out folder. It is just an output folder, and if you let it build up with clutter, you run the risk of eating up all the space on your SD card. If need be, move the items to the folder you created in the step above, so you can keep them.
- Enjoy your new VC frame!
Recommended Comments
There are no comments to display.
Create an account or sign in to comment
You need to be a member in order to leave a comment
Create an account
Sign up for a new account in our community. It's easy!
Register a new accountSign in
Already have an account? Sign in here.
Sign In Now