Search the Community
Showing results for tags 'tutorial'.
-
 So you want to make a ROM hack? First, you need a ROM to hack. It would be illegal to download one, but there are other ways to get a ROM. There's 4 major ways you can get a ROM, in order of speed (descending): USB Backup Device Slot 2 flashcart Slot 1 flashcart + EZ Flash 3in1 Slot 1 flashcart + Wi-Fi Note that 2, 3, and 4 all require that you use a DS lite (or original DS). Now for the details of each: 1. USB Backup Device There's several out there that you could find with a web search, but for ROM backups, I recommend the SMS4. I won't go into details of any others unless anyone asks. Chances are, if you have a USB backup device intended to back up ROMs, you would know. If you already have a USB backup device like the NDS Backup Adapter Plus or R4i Backup Adapter, these do not support backing up ROMs. 2. Slot 2 flashcart You have at least two choices. I recommend the NDS Backup Tool Slot 2 by Rudolph (not the red nosed). There's also a newer tool called Wood Dumper. I haven't tried it, but it looks good. 3. Slot 1 flashcart + EZ Flash 3in1 If you don't have a slot 2 flashcart but happen to have an EZ Flash 3in1, then you can use NDS Backup Tool 3in1. It will take significantly longer than the above tools, because it has to Erase the NOR Write a portion of the ROM (after you swap the flashcart with your game) Ask you to restart the tool Write the NOR to your flashcart If your ROM is over 32 MB, it will repeat this process until complete. 4. Slot 1 Flashcart + Wi-Fi Do you have lots of time? I hope you have, oh, say 12 hours to let this process go. Wi-Fi backup tools let you use your computer and your DS Lite compatible Wi-Fi to backup your ROM with the DS's very slow wireless chip. Be aware that the DS lite doesn't support WPA (which is what most people have). It only supports unsecured and WEP (which is more of an inconvenience to hackers than security). But if you happen to have compatible Wi-Fi, I recommend Rudolph's NDS Backup Tool Wifi, but it's more of a hassle to set up than Wood Dumper. NDS Backup Tool Wifi connects to your computer. Wood Dumper lets your computer connect to it. For NDS Backup Tool, refer to the readme in Pokedoc's Wi-Fi save backup tool. For Wood Dumper, find an FTP client (Windows Explorer has OK FTP support) to connect to: ftp://[ip displayed in Wood Dumper]/ If you have any questions, feel free to ask. But remember: downloading ROMs is illegal and could land you with severe legal consequences.
 -
 so i have this idea that i've been kicking around in my head probably since right after b2w2 came out in japan. i think this will be a set of games that is hacked for a good long time to come. this is quite likely the last set of main series releases on the ds. anyway, what if we could actually program for the games? i don't mean in assembly, but in C or C++. i know what i would have to do and exactly what i would have to write to create a nice, robust library for low-level manipulation of the game. for example, say you wanted to decrypt a party pokemon do something with one of its fields: (let's say the level for pkm party slot 3) u32 slot3_lv = getPkmStat(getPartyPkmAddress(&PkmBlk, 3), PKM_LV, NULL); you could do that instead of writing some assembler and compiling it with the gcc assembler from devkitarm, arm-none-eabi-as, and hoping you got the syntax right, all the pointers right, etc etc. some of the things you could do: -create your own set of overlays and load them like gamefreak using their overlay handler -not just write your own scripts, but write your own code and create your own script commands to use in your scripts -create your own data files and load them into memory to manipulate them with your own code -add your own code to the engine -add new fields and data to pkm files -add new data to the save game -add your own events and save them, add new swarms and other events -add new stuff to happen at midnight -tweak damage calculations, stat calculations, a lot of stuff without needing an AR -hell, rewrite the graphics renderer if you're feeling really enterprising my list of script commands is very nicely filled out and quite thorough- all from analyzed code, all completely correct. i've done everything on this list(barring a lame attempt at the last one). what i'm offering is a way to do it more easily through a library and higher-level code instead of assembly. something like this would be much more accessible. i have an IDA database absolutely packed with info that would be so useful to this along with quite a few pages in a notepad of stuff and even more kind of bouncing around in my head that i've never mentioned to anyone. i have a script compiler partially done, a script decompiler partially done, and the source files for libPKM prepped, but not started. this has the potential to be a full devkit for bw2. the reason i'm doing this and not just starting work directly is that i'm wondering how many people would actually use it. i can think of less than a half dozen people that even could use it. so.. would anyone out there use this? it would take hacking this game to a whole other level, but it's not worth doing if i'm going to spend a ton of time on it and no one is going to use it. i'd love it if people could get behind this a little bit because it has huge potential, but like i said i don't really know how many people can use it. thoughts?
 -

tutorial Editing Hidden Grottos via Hex
Drayano posted a topic in ROM - NDS Guides and Other Resources
It occurs to me that I've not actually explained how to do this yet so I figure I may as well: Step 1 - What's the file you need? You'll need to extract the a/2/7/3 .narc file from Black 2 or White 2. It doesn't really matter which. Step 2 - Starting Preparations. Open it up in a hex editor. I'd recommend crystaltile2 so you can quite easily jump between the files. Alternatively, you can use the kiwi.ds editor to extract the files separately, or whatever other method you wish. I'll walk through this tutorial using the Floccessy Ranch Grotto, which is the first file in the .narc. Step 3 - Editing the Pokémon Species. The whole of the first file looks like this: Now it's time to dissect what the file actually means! I'd highly recommend paying attention to this. It's a textified version of the Hidden Grotto listings done by Kaphotics, and it'll help you read what's going on here. The "CE 00 CE 00 CE 00 CE 00" at the start of the file is a reference to the four Pokémon who can appear with 1% frequency. In this case, Dunsparce takes up Group A, B, C, and D. Why Dunsparce? Dunsparce's index number is 206, which is 0x00CE (where 0x signifies it's a hexadecimal number). However, Pokémon games tend to use indices in a flipped form - the latter two bytes come FIRST, and then the former two bytes come last. So 00 CE becomes CE 00, and thus you see it as it's found in the data. You'll notice other similar strings within this document. As you can see from Kaphotics' list, Herdier is the middle frequency Pokémon. Herdier's National and also index number is 507 -> 0x01FB -> FB 01. You'll see two instances of "FB 01 FB 01 FB 01 FB 01" in the file (also two of "CE 00 CE 00 CE 00 CE 00). The first one refers to Black 2, and the second refers to White 2. So essentially, the file is split like this: The first part is the Black 2 encounter possibilites, the second part is what can appear in White 2. Most of the time this isn't utilised in the game, although you can see it in action in some areas such as Pinwheel Forest's interior, where Beedrill is found in Black 2 and Butterfree in White 2. In the Floccessy Ranch example, you can also see strings for Marill. Marill is 183 -> 0x00B7 -> B7 00, thus "B7 00 B7 00 B7 00 B7 00". Actually changing the species is simple - you just edit the strings shown! For example, if you always want Bulbasaur to appear in the Hidden Grotto with a 1% appearance rate, then you'd replace both instances of "CE 00 CE 00 CE 00 CE 00" with "01 00 01 00 01 00 01 00". That is of course, assuming you want the same effect in Black 2 and White 2. Alternatively, you might want any one of Bulbasaur, Charmander, Squirtle, or Pikachu to appear with a medium rate in the Hidden Grotto. This time, you'd replace the medium rate Pokémon string (Herdier, so FB 01 FB 01 FB 01 FB 01) with "01 00 04 00 07 00 19 00", referring to their index numbers 001, 004, 007 and 025 respectively. This gives them all an equal opportunity to be called (I think) when that encounter rate is selected. Thus, you can have to up to 12 Pokémon appear in a single Grotto on any version! So, that's the species. But what's the rest? N.B.: You can place any species in the Hidden Grotto, but they must have an overworld sprite in the game for them to show up. The first 493 Pokémon can all show up, but only the Unovian Pokémon shown on this sprite sheet will be able to show up successfully. Otherwise, you'll get a generic placeholder overworld (a boy with blue hair).. Step 4 - Editing the Other Pokémon Info. Let's take a look at an entire string of Pokémon hex in the Grotto, for one version: "CE 00 CE 00 CE 00 CE 00 0F 0F 0F 0F 0A 0A 0A 0A 1E 1E 1E 1E 00 00 00 00" "FB 01 FB 01 FB 01 FB 01 0F 0F 0F 0F 0A 0A 0A 0A 1E 1E 1E 1E 00 00 00 00" "B7 00 B7 00 B7 00 B7 00 0F 0F 0F 0F 0A 0A 0A 0A 1E 1E 1E 1E 00 00 00 00" Now, we already know these three strings combined make up the Pokémon selection pool for one version. The first one is the rarest, the second the middle, and the third the most common. You're also aware that there's actually four separate Pokémon that can be called in each group - although the game rarely has more than two species in the same group. (You can see an example of there being two in Route 9.) However, what does the remaining part mean? Let's analyse this... CE 00 CE 00 CE 00 CE 00 0F 0F 0F 0F 0A 0A 0A 0A 1E 1E 1E 1E 00 00 00 00 [color="Red"]CE 00 CE 00 CE 00 CE 00[/color] [color="RoyalBlue"]0F 0F 0F 0F [/color][color="SeaGreen"]0A 0A 0A 0A[/color] [color="Orange"]1E 1E 1E 1E[/color] 00 00 00 00 Suddenly the separate parts become a lot clearer! We already know the Pokémon species indices are the ones in red. The four bytes in blue refer to the maximum level that a Pokémon can be. The four bytes in green refer to the minimum level a Pokémon can be. The four bytes in orange refer to the percentage chance that the Pokémon that appears is female. Hidden Grottos don't generate Pokémon genders in the same way regular encounters do! As far as I'm aware, the last four bytes are always 00 00 00 00, so we don't need to worry about those. NOTE: It appears these values refer to the form(e) the Pokémon will take. I assume it works by slot correspondence, e.g. if your first Pokémon byte is EC 01, then set the first of these bytes to 01 and you should get the Sky Forme generating. There's one other important distinction here; the bytes are in groups of four as they each refer to a particular group! So in reality, they're split up as follows: [color="DarkOrchid"]CE 00[/color] [color="Lime"]CE 00[/color] [color="Teal"]CE 00[/color] [color="DarkRed"]CE 00[/color] [color="DarkOrchid"]0F[/color] [color="Lime"]0F[/color] [color="Teal"]0F [/color][color="DarkRed"]0F[/color] [color="DarkOrchid"]0A[/color] [color="Lime"]0A[/color] [color="Teal"]0A[/color] [color="DarkRed"]0A[/color] [color="DarkOrchid"]1E[/color] [color="Lime"]1E[/color] [color="Teal"]1E[/color] [color="DarkRed"]1E[/color] 00 00 00 00 The bytes that have a matching colour are the ones that are related to each other. Let's use one of our example strings from before... 01 00 04 00 07 00 19 00 14 14 14 14 0F 0F 0F 0F 32 32 32 32 00 00 00 00 This might be more easily read like this (even though you can't input this): "01 00 14 0F 32 00" - Species: Bulbasaur. Max Level: 20. Min Level: 15. Female rate: 50%. "04 00 14 0F 32 00" - Species: Charmander. Max Level: 20. Min Level: 15. Female rate: 50%. "07 00 14 0F 32 00" - Species: Squirtle. Max Level: 20. Min Level: 15. Female rate: 50%. "19 00 14 0F 32 00" - Species: Pikachu. Max Level: 20. Min Level: 15. Female rate: 50%. Just for a quick translation: 0x14 = 20. 0x19 = 25. 0x0F = 15. 0x32 = 50. The Pokémon in question can at any level between the max/min levels inclusive. For example, a Bulbasaur could generate in the Grotto and be encountered at Level 15, 16, 17, 18, 19, or 20. It also has a 50% chance of being female. From this it should be easy enough to see what's going on now. Just adjust the values to what you need! Quick word of warning, though. You cannot have the max and min levels be the same. If you do that, some funky stuff starts happening and they seem to be able to appear at any level they want. If you want them to appear at only one level, then use the max level as (min level + 1). This generally seems to cause them to appear at the minimum level anyway (though possibly not always). Step 5 - What's the rest? The remaining part of the Grotto files deal with the items that you can find in them. Using the Floccessy Ranch example again: The highlighted section is our items. It may look like random numbers, but when cross-compared with this page, it isn't! As we can see from that link, 0x0052 refers to a Fire Stone, 0x0054 to Water, 0x0053 to Thunder and 0x0055 to Leaf. This matches up with the Item 1 row in Kaphotics' list. Then the next bytes... 0x0002 are Ultra Balls, 0x004D is a Max Repel, and 0x0019 is a Hyper Potion. That's the item 2 list... etc. You probably get the idea by now. So, in short... First 8 bytes - 2 bytes for each group, visible item 1%. Next 8 bytes - 2 bytes for each group, visible item 4%. Next 8 - visible item 10% Next 8 - Visible item 25% The next 32 bytes refer to the four groups of hidden items, but it works in exactly the same way. There's no difference in the items between Black 2 and White 2, so whatever changes you make should appear the same in both. Step 6 - What file is what? These are listed in order in Kaphotics' list anyway, but in case you want another reference point: File 0 - Floccessy Ranch File 1 - Route 5* File 2 - Lostlorn Forest File 3 - Route 6 [Field, the one just around the corner from Driftveil] File 4 - Route 6 [Cave, the one just outside Mistralton Cave] File 5 - Route 7 File 6 - Route 13 [stairLeft, the one next to the staircase close to Cobalion] File 7 - Route 13 [stairDown, the one close to the Giant Chasm entrance] File 8 - Route 9 File 9 - Giant Chasm [in the plains, only after you defeat Ghetsis] File 10 - Route 22 File 11 - Route 23 File 12 - Abundant Shrine [Field, ie the one accessible by land only] File 13 - Abundant Shrine [Pond, you need Surf to access this one.] File 14 - Pinwheel Forest [interior, inside the forest over a river.] File 15 - Pinwheel Forest [Exterior, by the Challenge Rock.] File 16 - Route 3 [Daycare, the one just above the Doubles grass] File 17 - Route 3 [Pond, across the large pond] File 18 - Route 2 File 19 - Route 18 * The first Pokémon entry here (for your version) is the one that will appear by default when Bianca shows you this Grotto for the first time. --- Hopefully that helps some people. -
Hello All! As I have started to make my own skins, and see myself continuing to create more in the future I've decided to create this step by step tutorial to help out! This way I can have a nice and easy place to point people towards for install instructions and as a file dump for my own created skins . What this will allow you to do: You can use any official c-gear skins that you either missed or are unobtainable due to region or release. You will also be able to use completely custom skins, I will provide my skins I have created in this thread. Ultimately you will get to turn your bland c-gear into stuff like this: PokeGen C-Gear Tutorial First and foremost you will need access to your save file. If you are simply running on an emulator or a flash cart this is easy and you should already have the knowledge of how to get this! If you are wanting to use this on your retail cartridge you will need a save dongle to retrieve your save file and then put it back on your cart. That being said, lets get started! Open up PokeGen and load your save (File>Open). Your save will load, and you will see all your Pokemon in your party and boxes show up. We are not going to change or mess with them at all, so if you are trying to keep a clean and cheat free game don't worry, the save will be fine! Your next step is to open up the C-Gear tool (Tools>C-Gear Background) You will see a new window pop up that has your current C-Gear in the left hand box. The right hand box should be empty. In my example below you can see the pikachu c-gear skin which is a standard skin available on the global link to anyone. Click the "Open" button and navigate to the C gear file that you would like to change it to. This has to be a C gear file type. Select your file in the browser and hit open. You should now see your desired skin on the right hand box. If everything looks correct on the right hand side, click the arrow in between the boxes to overwrite the c-gear skin that is currently on the game. You should now see both boxes have the skin that you want to use. That's all you need to do, pretty simple right? Close out the C-Gear Window, and save your changes! Now just put this save file back on your cartridge and you've got yourself a spiffy new c-gear to make everyone else jealous! C-Gear Skins For official skins Please head to the C-Gear Skin Gallery on Project Pokemon! Previews of my own current custom made skins can be seen by clicking the spoiler below. Download the Piggman's Skins attachment for these. For more user made custom skins, and official skins after the date of this posting, see this ProjectPokemon thread. If you have any requests for a custom skin, you may make a request, but there is no guarantee that I will do it. (I have to usually find a request interesting/fun myself before doing one) 157 July 12th 2012 Piggman's Skins..zip
-
Ive searched youtube, forums, pokecheck, all types of sites to try and get it right but everytime i try to make a pokemon with pokegen for pokemon pearl something always comes out wrong to make my pokemon ineligible. I would very much appreciate if someone could make a personal video of the pokemon im trying to make. It might be a bit much to ask for just myself, but i would very much appreciate it. Anyone looking to help i can send the details of the pokemon, stats, trainer id etc etc...
-
Hi all, my name is Zappo23! This is my very first tutorial, a complete guide to PokeGen for beginners. I tried to answer as many questions as possible with this tutorial, explaining every part with painstaking detail. This is the first tutorial that I'm posting. The reason I chose to make a PokeGen tutorial is that information about how to use it seemed too scattered. So, I decided to make a full-fledged tutorial. In Word, it's 24 pages long :biggrin:. But luckily for you, I have it here in PDF format hosted by Scribd. Complete with pictures and examples, this tutorial is sure to answer any questions you might have about a particular aspect of PokeGen. Also, if you read my tutorial and see that something is missing, or that any information is incorrect, please do not hesitate to tell me because I will fix it and update it as soon as possible after such occurrence. This link will redirect you to Scribd.com, which is a safe and secure, FREE document hosting site. Also, the conversion was kinda bad so the hyperlinks to downloads are THERE, it's just...their lines are ABOVE them instead of beneath them. Basically, every time you see a blue line, click underneath it:biggrin: . My next tutorial is going to be ShinyGTS. I also noticed about ShinyGTS that solutions to several different types of problems are also scattered around the web, so I am going to make it my personal mission to compile all the information I have learned into one comprehensive tutorial and troubleshooting guide. I hope you guys enjoy my tutorial!
-

tutorial Adding Formes to Black and White
KazoWAR posted a topic in ROM - NDS Guides and Other Resources
With this article posted pokebeach. I decided to try to see If I could modify and even add new formes to the game. The data chart in the article can be found in a/0/1/6, the stats files. The files in the narc match up to each Pokemon's national pokedex number. after 649 are the stats for formes. I am not sure what file 668 is, I added my two new files as file 669 and 670. For the Pokemon you want to add a forme too, open the file that matches there pokedex number and edit these offsets. offset 0x1C(2 byte) = Nobis offset 0x1E(1 byte) = Sprite offset 0x20(1 byte) = Formes Make the Nobis equal the file in a/0/1/6 you want its stats to be, leave it at 0 if the stats do not change. The Sprite is the number for what sprite to use. You can only use sprites that come after Genesect. using 1 will use the first sprite after Genesect. The sprite files are in a/0/0/4. Each Pokemon uses 20 files for their set of sprites. After Genesect's last forme sprite, there is some other data there and a long list of palette files. Not 100% sure what these are for, might be used for Arceus and all his alternate forme's colors. I added 15 dummy files to pad it to 14300 files so it would take up the space of 3 sprites(60 files) and make my added sprites be align to the 20 files per sprite rule. For this example I copied Reshiram and Zekrom's sprites. You also need to add sprites for the part icon. These files can be found in a/0/0/7. The first file is a pal file, followed by 2 files per sprite. Since there is 60 files (3 sprites) of dummy data after Genesect's last forme sprite, we must also add 6 dummy files (3 sprites) to the party icon file before adding our own. For this example I also copied Reshiram and Zekrom's sprites. Forme is the number of formes a pokemon has. If the pokemon has no extra formes this number is 0. If the Pokemon has 1 or more alternate formes then the number is the number for extra formes plus the base form. Shaymin has this value as 2 for it's Land and Sky forme. Pokemon who have a 1 here only have 1 forme in the current game and extra formes in future games. If a Pokemon has more that 1 extra forme, when it is in the first alternate forme it uses the data for the Nobis and Sprite Bytes. The next forme will use the data after those. Example would be Nobis of 669 and Sprite of 63 will cause the first alternate forme to use Nobis 669 and Sprite 63, the second alternate forme will use Nobis 670 and Sprite 64. I do not have any idea how to change formes in game with pokemon who have new forme, but you can have them appear in the wild in the forme and it will keep the forme once captured. Here is a video showing the results. -
 Sorry guys but the results are in and this isn't working. I don't know what else to try so consider this project dead until further notice. The following is kept for informational purposes only: MUST-READ: There are several important pieces of information that you should be aware of here: I recommend that you DO NOT use the method I am going to detail here. This method is potentially risky and much more restricting than simply using a save editor (which I do recommend). This requires your copy of D/P/Pt/HG/SS to be retail; no flashcards. This requires at least one DS "Phat" or DS Lite. The second DS can be any model DS, as long as it will run Black/White from a flashcard. This requires that you flash the firmware of your DS "Phat" or Lite. Flashing carries an inherent risk of bricking your device and/or voiding your warranty. I am not responsible if that happens. That said, I have flashed my DS without a problem and will provide guidance for you. Firmware can be flashed back to its untouched state later. If after reading the above bulleted items, for whatever reason, you still want to try this method, follow the step-by-step instructions below. For now the modifications I've made are only available as part of Project Pokemon's English translation patch. Make sure you have applied the latest version from here to your B/W ROM. Just let me know if this doesn't meet your needs. Now we need to flash your DS "Phat"/Lite. Download FlashMe from here and place it on your flashcards's microSD(HC). Make sure your flashcard is in the Phat/Lite you want to flash. Boot your flashcard and run FlashMe. As it will tell you, you should plug in the charger before continuing. Once that's done press x+b twice. Now you'll see a new paragraph followed by a line reading "Progress:" ... If the progress percentage goes right to 100 and you get a new paragraph saying it's safe to turn of the DS, you're done. Most likely in that last step you didn't make it past 0%. If that's the case, get out a small Phillips screwdriver and a small flathead screwdriver. Use the Phillips to open up the battery compartment of your DS. Depending on if you have a Phat or Lite, you will see something like this: The part circled in red might have a bit of paper stuck over it, you will have to remove it. You can either discard it or try to stick it back when you're done. Now you have exposed the SL1 terminal (circled in red). As FlashMe says, we need to short this. Use your flathead screwdriver to bridge the two sides. Make sure you're applying constant, firm (but not hard) pressure on the screwdriver. Flip your DS around, still holding the screwdriver in place, and have another look at the percentage. It should be progressing upwards now. If it pauses don't panic, just adjust the screwdriver a bit and it should continue. Continue holding the screwdriver until you get a message that it is safe to turn off the DS. Turn it off and you're done flashing. You can ditch the screwdriver and put your battery cover back on. Upon turning on your DS again you'll notice that the health and safety screen is gone, this is normal. You can now PokeShift/Transfer Machine as you normally would, only with an English game. Just make sure the English game is in your flashed DS and your B/W is patched as mentioned in step one. Enjoy! Technical Note (You don't need to read this.) Some folks out there might be wondering why it's necessary to flash the client DS. After all, nobody has needed to flash a DS since practically the beginning of time right? Well, as you probably know B/W uses download play for cross-generation communication. That brought in an ancient problem in respect to editing the regions. The region is of course specified in the download play ROM (which is inside and sent from the B/W ROM); problem is, Nintendo decided in developing the original DS that all download play ROMs must be RSA signed to prevent unauthorized code execution. Lucky for me there was an ancient solution to this ancient problem: flashing, which removes the RSA signature check from the DS's firmware, freeing it to run my slightly modified ROM. =) I'd like to give a big thanks to to those who worked on FlashMe and its custom firmware; this wouldn't be possible without them.
 -

tutorial PPRE Trainer Battle Script
TheShadowWalke posted a topic in ROM - NDS Guides and Other Resources
EDIT: I added a new script at the bottom of this post. Hi guys, this is my first tutorial so sorry for mistakes Anyways, like the title says, it's about Pokemon Trainer Battle Scripting. So far I only know it works for HG/SS. If you want to use in Platinum or D/P, feel free to try and please tell me if it works. On to the tutorial. Here are the tools you need: Once you've downloaded the things needed, put your HG/SS rom into PPRE's folder. Then open up PPRE and click on choose rom. Select your rom and click Set Rom. Then command prompt should appear. PPRE is extracting your rom now. Once PPRE has finished, click on Trainers. Once you opened up Trainers, select a random trainer from the list. Edit the Trainer's information now(Number of Pokemon he/she had and so on). Once you changed the number of Pokemon, click another trainer from the list and go back to the trainer you edited to see that the number of Pokemon had changed. NOTE: I can't seem to edit the Trainer's name, so I used an older version of PPRE, which worked. However, the Pokemon's level is maximum 99 and I cant save my scripts using that. After you've edited the Trainer, TAKE NOTE OF THE NUMBER BESIDE HIS/HER NAME. IT'S VERY IMPORTANT. For me it's 24. Save your changes afterwards. Next, go to Maps and choose the map you want. For me I'm going to use Cianwood City Gym. Go to the Events tab and click on Overworlds. See the number at the top right corner? That's the number of overworlds. Click on the up arrow to increase the number of overworlds. You might see a new tab now. Type in the ID of the overworld, which is this: Now type in the sprite. The values for them are here: However, PPRE can read only Dec numbers, but these are Hex numbers. So open up Calculator, and go to the Scientific Mode for XP. I don't know what to press for the other computers so you have to figure out yourself. Go to Hex and type in the number for the sprite. Click on Dec next to get the Dec number. Write this in PPRE. Next for the movement. I don't really have the list for the movements(I'm too lazy to figure out :'( So if you got the list, please tell me and I will give credit.) However I do know that 15 is facing down and 20 is facing up.) Type it in the box. Flag... I don't really know what's that but I will figure it out sometime, probably after B/W is released.. I'm just too busy :sleeping: Script we will come to it later. Line of Sight, by the name, you probably know what's it. It's use for detection for normal trainers, like when you're walking along Viridan Forest when a trainer spot you. X-, Y- and Z- coordinate, pretty simple. I don't know bout Z though. Anyway, you might ask, how do we find the X and Y coordinate? Simple! Using the Lua Script, open it in DeSmuME and activate the script! Move to the spot where you want your trainer to be at and he will stand there! However the Lua Script doesn't work on Patched Roms. After finding out the X and Y coordinate, type it in the boxes. Once you've done all these, take note of the ID of your overworld. Next, go to the Text tab. You will see that there's already a lot of text. Write your trainer's beginning and losing text like this: text_[continued number]="[text]" So for example I want to write this: Yo! This is a guide! And the text number is 5, I will write in PPRE this: text_5="Yo! This is a guide!" Just remember, \n is for line break and \r is for new box. After writing your text, note down the text numbers - both beginning and lose text. I don't know how to make the winning text activate, sorry Now go to the Scripts text and go to Scripts. Press add script and go to the new script. Now we can begin writing our script. Example of Script: Lockall starts your script. Lockall is basically the same as the script starter you use when hacking GBA games. Faceplayer, too, exists in GBA hacking. Just let the trainer turn to you when you talk to him/her. Message [number] is the text you wrote just now. [number] is the text number which I told you to note. WaitButton and CloseMsgOnKeyPress works together. The trainer battle will begin after you pressed A or B(WaitButton). The message will then close(CloseMsgOnKeyPress). TrainerBattle [number] 0 1 starts your trainer battle. [number] is the trainer number I told you to note just now. You can see why it's important now. Message [number] is the losing text. Releaseall MUST be present if you wrote Lockall. It releases the NPCs around. End is the ending of the script. VERY IMPORTANT. Now that you finished your script, save your changes. Go back to PPRE and type in your rom name, also remember to write in the ".nds" without the quotient marks. After your rom has finished creating, open your rom and enjoy! Also if you want to edit the sprite of your trainer, I might write a tutorial on it, but it's best if you follow KazoWAR's on Youtube. Thanks for reading my tutorial! This is my first tutorial so I hope you would rate my skills on writing tutorials. ---------------------------------------------------------------------------------------------------------------------------------------------------------------------------------------------- Here's a completely optional part: Removing people. Basically, after you've finished your battle, you can make the trainer disappear. Here's an example of the script: The new part edited, as you can see, is Applymovement 5 mov_1 Waitmovement Removepeople 5 Before I go into explaining, go to Maps, choose your map and Scripts, before finally going to Movements. Choose Add Movement. A new tab should form. Now, you have to write your movement. The movement format must be like this: [movement_name] [number_of_times] Movement_name is the type of movement you want your OW to move, such as the 1 I used, WalkDownNormal. Here's a list of the movements: Number of times is the number of steps you want your OW to move. Pretty simple, you should understand. Now to explain the script. Applymovement [OW ID] [mov_[id]] is put into your script. Applymovement is to apply a movement on [OW ID] which is your OW's ID, which I explained earlier at the previous post, and [mov_[id]] is the ID of your movement. For me it's mov_1. Waitmovement is to wait for the movement to be finished before the OWs can be released. Removepeople [OW ID] is to remove the OW you assigned to. By now you should know what's [OW ID]. So now that your movement script is finished, save your changes, write your rom and begin playing! ~Hope this helps!~ LUA Script.zip -
PPRE Tutorial & FAQ Welcome to the Project Pokémon´s ROM Editor Tutorial and FAQ! Please go to THIS TOPIC to download the newest version of PPRE. This tutorial should give you all the information you'll need to get the programme working. Some extra information is given in CODE fields. You can ignore these parts of the tutorial if you already know how it works. If you already have your map with the downloaded files and a Rom File, you can SKIP STEP 1. If you're uncertain if you did the right things, just read STEP 1 as well. Tutorial Step 1 First create a New Map. For example, go to My Documents, hit the right mouse button and select 'New > Map'. Rename this map to 'PPRE' for convenience. I'll call the new created map PPRE from now on. The second step is to download the programme. Check the official PPRE Topic for a download link. What you actually download is a .ZIP file. [size=3][b]Extra:[/b] [i]What are .ZIP files and how do I open them?[/i][/size] With special programmes, you can create .ZIP files. .ZIP files make it easier to carry different files; it compresses SEVERAL files to ONE file. For example; to get PPRE working, you need 3 other files. Instead of downloading these 3 other files seperately, you can just download them all at once via a .ZIP (''package'') file. You can open .ZIP files with programmes like WinRAR or WinZIP. Evaluation Versions of these programmes can be downloaded for free from their sites. Just click one of the links below to go to their official site. [list] [*][url="http://www.rarlab.com/download.htm"]WinRAR[/url] [*][url="http://www.winzip.com/index.htm"]WinZIP[/url] [/list] Open the downloaded .ZIP file with either WinRAR of WinZip. It contains 4 files, which should be: ndstool.exe ppre.exe Tabel.tbl thenewpoketext.exe If this is correct, select the 4 Files and hit the right mouse button. Now click 'Extract...' (or something like that, it might differ between the programmes). (Check the Spoiler for an image) A new screen opens. Search for your new created map and hit the Unzip / Extract button. The 4 files will be extracted to your new map! You now need a Pokémon Rom. It has to be one of the following Roms: Pokémon Diamond Pokémon Pearl Pokémon Platinum Pokémon Heart Gold Pokémon Soul Silver [size=3][b]Extra:[/b] [i]Where can I download a Rom File?[/i][/size] Please remember though that Rom Files are [b]ILLEGAL[/b]. You may only use them if you have an original copy of the game. I can't help you with downloading a Rom file as they are illegal. NEVER ask for a Rom File on this forum. The rom has to be UNTRIMMED (untouched). The Rom should be in a .ZIP file, too. You have to Extract the Rom to the SAME NEW MAP! The following thing is very IMPORTANT. Open your new map where your Rom File should be. Now RENAME the Rom File. For example, if you have a Pokémon Diamond rom, rename it to: diamond.nds, if you have a Pokémon Platinum Rom, rename it to platinum.nds and if you have a Soul Silver Rom, rename it to soulsilver.nds, etc.! This might seem unnecessary, but it is very important. What we have is a New Map (hopefully named PPRE) with 5 files (the 4 PPRE files and 1 Pokémon Rom). Step 2 Now you have to open the ppre.exe file. Double click to open it. You should see the following screen (beta-number might differ). Follow the following steps to get the programme working. Never forget any of these steps or it will go wrong! Step 1: type in the name of your Rom (which should be diamond.nds, pearl.nds, platinum.nds, heartgold.nds or soulsilver.nds) in the RED TEXT FIELD. With 'Red' I mean the red-circled field as you can see in the screenshot above. You have to add the '.NDS' suffix! Step 2: Now you click the green-circled button 'Set Rom'. A black screen should open. Please wait, it will take around 1 minute. Do not click anywhere during the progress. When the black screen goes away, you can continue to Step 3. [size=3][b]Extra:[/b] [i]What is happening during Step 2?[/i][/size] The ppre programme is now 'opening' your rom. It uses the ndstool.exe file to create a temporary map, which is needed to edit your Rom. In your PPRE map, a new map should be created, called: tmp_platinum if your game was Pokémon Platinum Version, or tmp_pearl if your game was Pearl, and so on! This map is needed to edit with PPRE, so DO NOT delete that map. Step 3: it's time to edit! I might create a tutorial about how that works, too, but for now, you should be able to do it yourself! You can edit POKéMON, MAPS and TRAINERS. As this is a Beta, you can not edit ABILITIES, ITEMS, MOVES, etc. yet. Don't click that buttons. Step 4: ah, so you changed the things you like? You made Lugia evolve into Magikarp and Pikachu evolve into Arceus? Eh, nice. Now you have to save your game. Take a look at the screenshot. You see the blue-circled textfield? You have to enter the following: pearledit.nds if you were editing a Pearl Rom, platinumedit.nds if you were editing a Platinum Rom, heartgoldedit.nds if you were editing a Heart Gold Rom and so on! Step 5: now click the orange/yellow-circled button 'Write ROM'. Wait a minute again and take a look at your PPRE map. A new file called platinumedit.nds (or something else, depending on the rom you're changing) should be created! YOU NOW PERFECTLY EDITED YOUR ROM! Thanks for using this tutorial! Happy Rom-editing! [ --- I'LL ADD THE FAQ HERE VERY SOON AND UPDATE IT FROM TIME TO TIME, PLEASE HAVE SOME PATIENCE! --- ] @ the Moderators, as my mother language is not English, be free to edit any typo's and spelling errors.
-
 Anyone with a guide or tutorial that they would like added to this directory please post here and I will add it to the first post. Please be sure that all guides are complete and as accurate as possible. DDD's Sprite Editing Tutorial &
 -
Download the patch: HeartGold - SoulSilver For those of you who just want to use this and don't give a crap about how it works, follow these simple steps: If you don't have them already, you'll need CrystalTile2 and Tsukuyomi UPS (or any UPS patching tool). I've tailored this guide/patch to work with any HG/SS ROM, no matter how much anti-anti-piracy, translation, etc. crap you've applied. Open your HG/SS ROM with CrystalTile2 (you can ignore the small window that pops up when you first open the program) and go to Tools>NDS File System. A new window will pop up with a long list of files. Scroll down until you see the one labeled "overlay9_0074", right click it, and select export. Save the file anywhere you like. Open Tsukuyomi UPS and select "apply patch to an existing file". Use the file you exported as the target file and apply the patch that corresponds to your game. Switch back to CrystalTile and right click the same file as last time, then select import and browse to your patched "overlay9_0074.bin". You're done! Save the ROM and you're ready to start migrating from your English GBA games. Now for details. I'd done this before on D/P/Pt but HG/SS's overlay files are compressed, so it wasn't as simple as the find and replace it had been in D/P/Pt. Initially this had me stumped because although I knew the files were compressed (and there's documentation around on how they're compressed), I am not much of a programmer and didn't have any tool to help me decompress the files. Yesterday though I realized that the function was included in CrystalTile2, a program that has been sitting on my desktop for some months but never got fully explored. Fail. Anyway, just right click a compressed overlay in CrystalTile's NDS filesystem explorer and you'll have the option of decompressing and saving it or opening a decompressed file and compressing it to that location. The process once you've got the decompressed overlay (#74) is easy enough; do a text search in a hex editor for AXVJ. It'll find a small list of game IDs for the 3rd gen pokemon games in which you can replace all J's with the letter corresponding to your language and vice versa. Save and compress/insert the edited overlay and you're good to go. Any 4th gen game can be hacked to accept any third gen game in a similar manner. Hope this is useful to someone! A big thanks to Mewtwo2000 who originally showed me how to do this for D/P.
-

tutorial How to fix the freezing issues (Not sure, but it should work 100%)
Guest posted a topic in RAM - NDS Cheats
So, if you want to fix the freezing problems, there is an ActionReplay DS code and a Codebreaker DS code that allows you to play without freeze. The ARDS code is 020DD9E4 E1A00000 (You have to tick the "RAW" box on NO$GBA) The CBDS code is 220DD9E4 E1A00000 (You don't need to tick the "RAW" box) I found the ARDS code on the internet, then converted it to CBDS using a code converter, tested it and it worked. Now, if you have a flashcart that supports full ARDS (Including raw) or supports CBDS, you're good to go. Please note that I only tested these on NO$GBA, so it might only work on this. If you want to help me, you can tell me if R4DS supports either raw ARDS codes or CBDS. I know if supports ARDS, but I don't know about CBDS and raw ARDS codes. -
 Hi ProjectPokemon, I have noticed many translation hacks and yet their translations are missing english banner informations. I don't think images are necessary but here is an example if you don't understand what I'm talking about: "Pokemon Heart Gold NDS Version Nintendo" So now you're translation(s) can look more official! I have only done Heart Gold so far so I don't have a Soul Silver file yet but tell me if I should upload one You just need a uncompressed Pokemon: Heart Gold Version ROM (not supplied because it would be illegal to distribute them), TheNEWPokeText (I think we all know where it is located), and the edited banner file (Click here to Download). Just replace the banner.bin file located in your "tmp_XYZ" folder (Note: Not actually "XYZ" but your ROM's name) and repack the files into your ROM and you're done. Remember to give credit to me if used Project X out
 -
I can't find one anywhere (that's suitable for me, and specifically for games). I already understand Hexadecimal, Binary, Octal (Not that I'll need it), Decimal (THE HARD KIND), and how to convert between them. I also know Logic Gates, but that probably only applies to hardware, not software. I want to learn about addresses, and what order I would put a code in, and things like that. I own a Trainer Toolkit, but I don't understand large portions of the manual. If anyone could give me a link to a website that I don't have to sign up for, I would be eternally grateful. I still don't get what 32-bit addresses and "If equal to/If more/less than" means. If you know an incredible tutorial that I would have to sign up for, that would be fine, too. Thanks in advance!
-
Smudge sigs almost always look good. Often, its pretty easy to actually get started with making them. This tutorial is a quick compilation of what I do to create signatures. Heres the tutorial: http://www.youtube.com/watch?v=LXfkI2P6ajs Result: Find your own render, there are plenty. Just look around. In any case, I'd like to make a request. Use this specific format for learning. There are many much better formats that you'll learn over time. My format is outdated, but I don't feel like doing a new tutorial. Still, you I hope you find it useful. Thanks!
-
0. Why PyQt? When ever one plans the development of an application, an important consideration is the language one will use to code it. Some of the things that can play a role are: Will the application have a GUI Will the application be cross-platform or platform specific. Do you want a high-level or low-level language (or something in between) Nowadays, it is very common to want to develop applications that have a user friendly GUI. For windows only applications C# is a great option. Visual C# Express is available for free from Microsoft and has an easy to use GUI builder. However, if one wants to code a cross-platform application C# is no longer such an attractive option. While The Mono Project aims to allow for C# applications to be cross-platform there are many things missing. C++, a very popular and poweful language, is a cross platform language, but unfortunately it does not have a standard GUI builder. What one must do is decide on a package to use for the GUIs. Some populat options are WxWidgets and Qt. However, C++ is a low-level language. If one prefers a high-level language to stay away from all the complications of programming in C++, Python is a great option. Like C++, it is a cross-platform language. Also like C++, it does not have a standard GUI package. Because Qt is one of the more powerful and expansive GUI packages for C++ and has been ported to python, PyQt is one of the best options for developing GUI applications with Python. The official PyQt introduction can be found here: http://www.riverbankcomputing.co.uk/software/pyqt/intro Or particulat interest is: As mentioned in the official Why PyQt?, Python is an interpreted language, whereas C++ is a compiled language. This can mean slower applications. When speed is a crucial issue, one might choose C++ despite having to deal with the low-level language implications. I. Getting Started Here a few things that you need to get started with PyQt. Python 2.6 http://www.python.org/download/ PyQt4 for python 2.6 http://www.riverbankcomputing.co.uk/software/pyqt/download I started learning pyqt from this book: http://www.qtrac.eu/pyqtbook.html Even if you cannot buy the book or find it at a library it is still useful to get this: http://www.qtrac.eu/pyqtbook26.zip Inside you will find sample code and more importantly Make PyQt (makepyqt.pyw) Make PyQt is a python program that will turn the ui files made using the Qt Designer. II. A PyQt IDE While it is possible to develop pyqt programs with only a text editor, there are many conveniences that once can take advantage of. I would at least recommend using the Qt Designer (comes with PyQt) and Make PyQt (makepyqt.pyw) to generate the code needed for the GUIs. Combined with something like Programmer's Notepad this works very nicely. However, for those who prefer to use an IDE, there is a good option. The Eric4 IDE is a great tool that helps keep one's projects in order. I will be using it for the examples. III. Example (Updated example, comming soon) PyQt programs begin as follows: from PyQt4.QtCore import * from PyQt4.QtGui import * import ui_ppremain PyQt4.QtCore and PyQt4.QtGui are the basic modules that we need to make PyQt Programs. import ui_ppremain, imports the file ui_ppremain.py, which is what makepyqt.pyw outputs when you choose to build in the directory where you have your ui files. and the code that executes the program as follows: app = QApplication(sys.argv) mw = MainWindow() mw.show() app.exec_() the code for the main window would be: class MainWindow(QMainWindow, ui_ppremain.Ui_MainWindow): def __init__(self,parent=None): super(MainWindow,self).__init__(parent) self.setupUi(self) self.updateUi() self.romname=""; def updateUi(self): self.nameLabel.text="ROM Name:" One thing to notice is that indentation is important in python. Structure is provided through indentation rather than braces as in other languages. More concrete examples to come later. Feel free to ask questions.
-
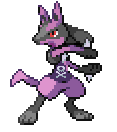
 Ok not sure if im posting this in the right place but Here it is Credit to CodeBrain for this one: First, open up your rom with NDS Top System. Then load your Rom. Then, go to the browse section, and open the poketool folder. (Look at image Tut-01 in attached.) Go into the pokegra folder, and right click on pl_pokegra. Click extract and save it somewhere. (Look at images Tut-02 and Tut-03 in Attached.) Open pl_pokegra in Poke DS/Pic Platinum. Head down to number 1495, and click the SavePng option. Save it in the a folder with any name. Do this with 1497, and 1499 as well (Save them in same folder!) (Look at images Tut-04, Tut-05 and Tut-06 in attached.) Open them all in Adobe Photoshop. Look at the FRONT sprite. Click on Image, then Mode, and finally on Color Table. (Look at images Tut-07, and Tut-08 in attached.) Edit the colors as you wish, but only from the COLOR TABLE. In this case, I recolored Lugia into Shadow Lugia. Here is his sprite: While still in the Color Table menu, click the Save button, and name it something. Look at the back sprite. Click Image, Mode, and finally Color Table. (Look at images Tut-09 and Tut-10 in attached) Click load, and find your previously saved table. (Last step) Your image SHOULD look the same as this: i19.photobucket.com/albums/b152/ShadowFireMario/back.png If it only looks slightly different, then it shouldnt be a big deal. When I say small, I mean like the eye color is different. Just replace it with the real color thats in the COLOR TABLE ONLY. If it really looks different (aka the purple is orange) then your not using the same palette. Save both images, doesnt matter if it's interlaced or not (I dont think it does...). Open Pokemon DS/Pic Platinum (In case you closed it) and go to #1495. Replace this image and the next one with the Shadow Lugia back sprite. Replace #'s 1497, 1498, 1499, and 1500 with Shadow Lugia's Front sprite. (Look at images Tut-11, and Tut-12, in attached.) If done correctly, no palette errors should occur. If there is (Such as a corrupted image or colors arent right, etc.) See the FAQ. Open NDS Top System, go to the Poketool folder, then the pokegra folder. Right click on pl_pokegra.narc, and click import. Find your edited pl_pokegra.narc, and import it in. Load up your game and see if it worked! I made a shadow lugia sprite Also thanks to SCV for making PokePic Platinum